Getting started
Apollo Editor lets you build and edit websites the way you'd edit a document - click on the page and type - while keeping clean, standard HTML and CSS that you can look at and change whenever you like.
What you need
- A Windows 10 or Windows 11 PC (64-bit).
- Your Installation Key from your purchase email. It looks like
XXXX-XXXX-XXXX-XXXX(16 letters and numbers). You can design, edit, preview and save websites before you activate; publishing needs the key. - To publish online: the FTP, FTPS or SFTP details from your web host - server address, username and password. Most hosts show these in their control panel (for example under FTP Accounts) or in your welcome email.
Install and activate
- Run ApolloEditorSetup.exe. If Windows shows "Windows protected your PC", click More info then Run anyway - this appears for software from smaller publishers.
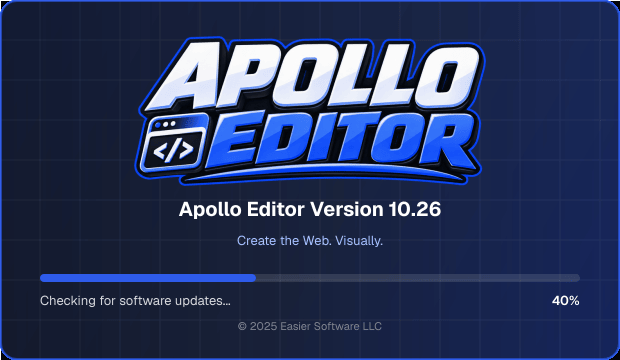
- Click Next, Install and Finish. Apollo Editor starts with a short splash screen.
- Choose Settings › Enter Installation Key, paste your key and click Activate. (See Your Installation Key.)
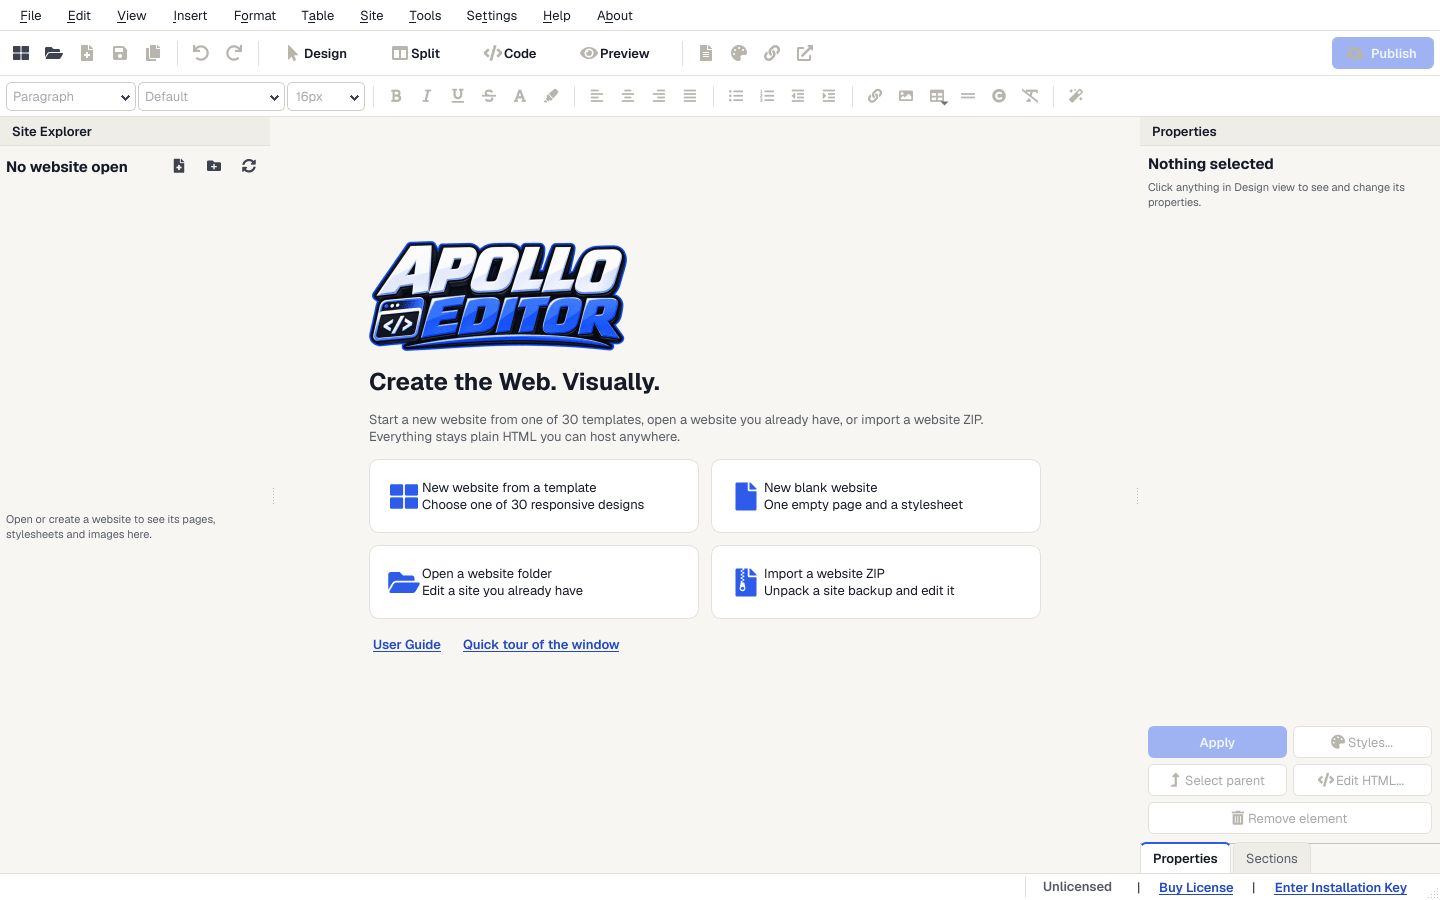
- The Welcome screen offers four ways to begin: a new website from a template, a new blank website, opening a website folder you already have, or importing a website ZIP.
A quick tour of the window
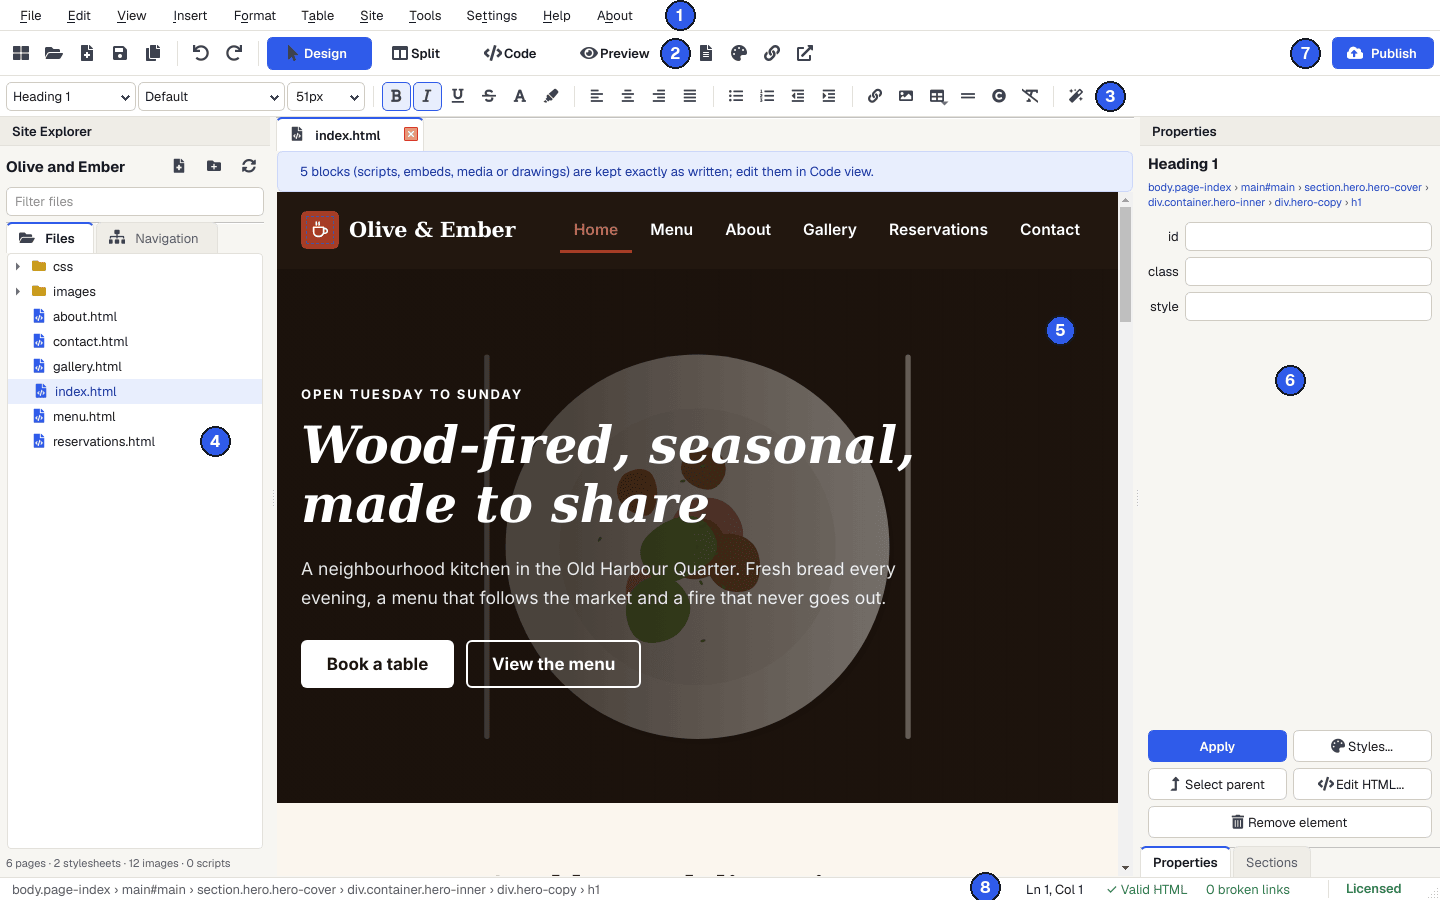
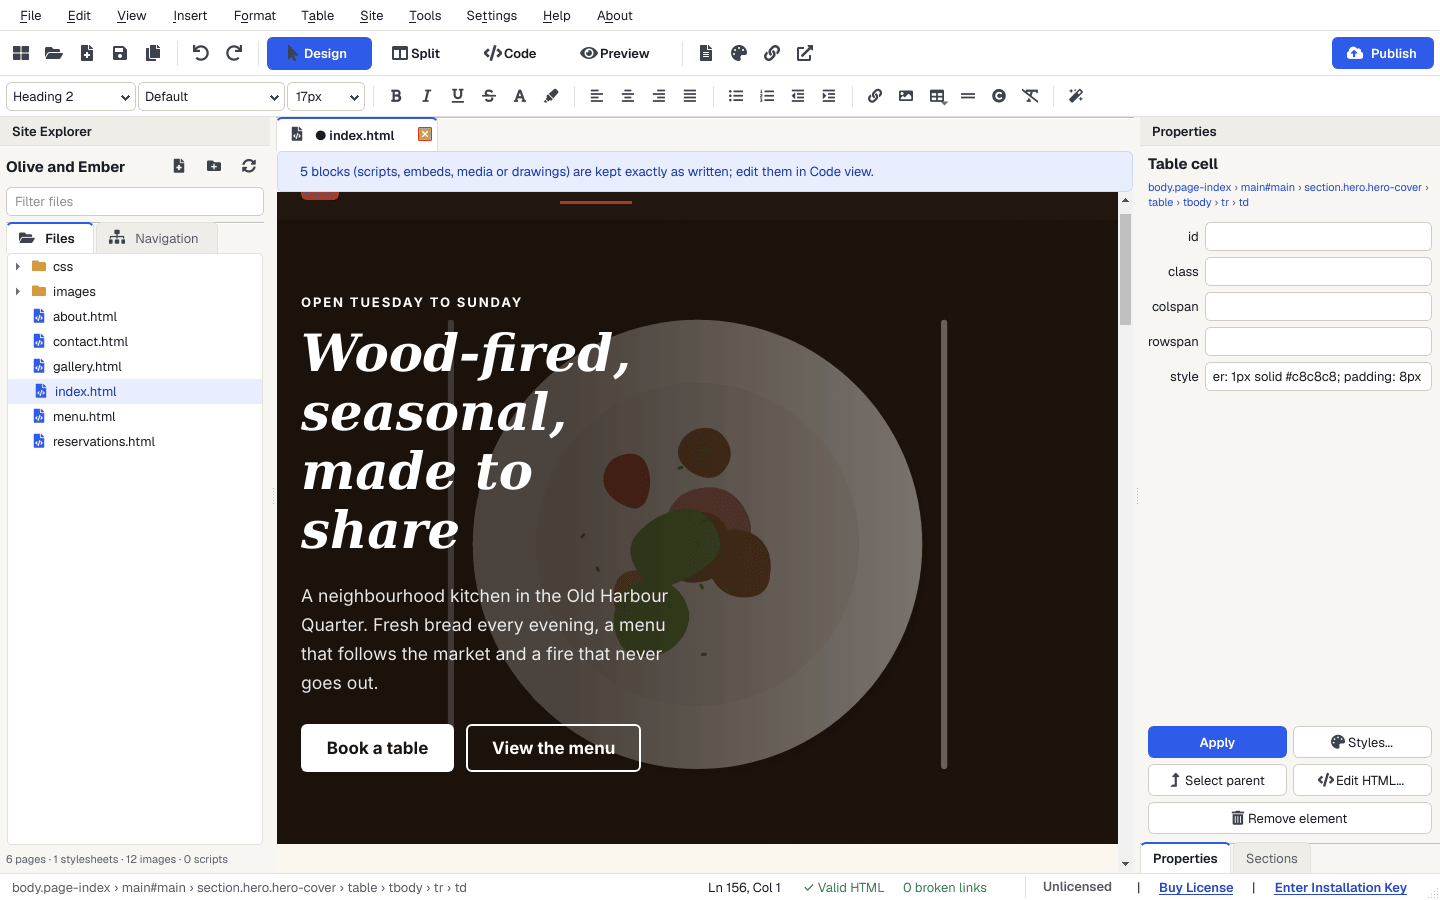
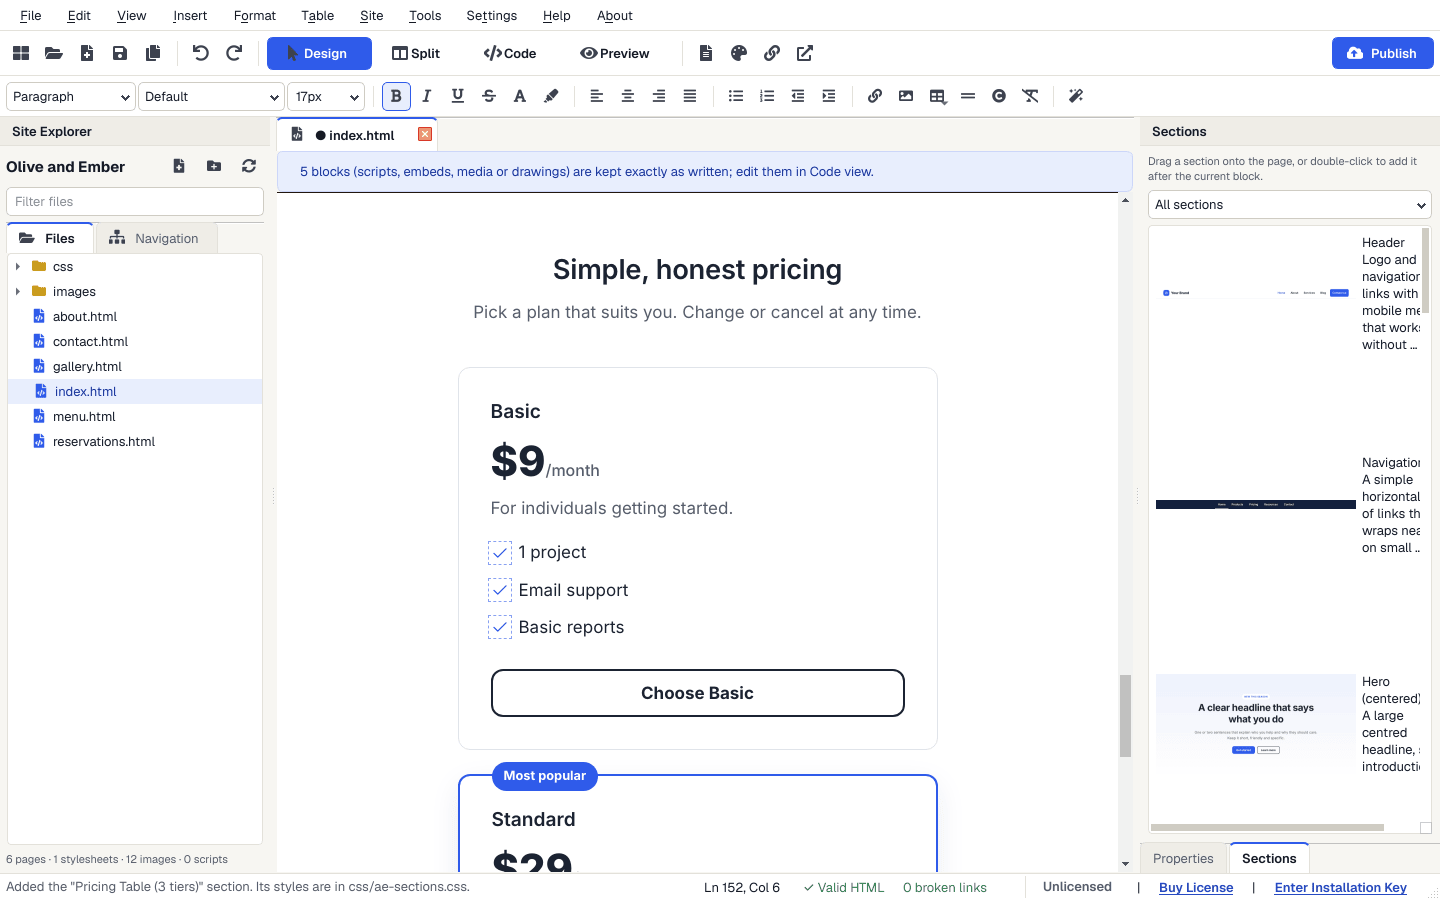
- 1Menus - File, Edit, View, Insert, Format, Table, Site, Tools, Settings, Help and About.
- 2Views - Design, Split, Code and Preview (Ctrl+1 to 4), plus new page, stylesheet, link and open-in-browser buttons.
- 3Formatting toolbar - paragraph style, font, size, bold, italic, colours, alignment, lists, links, pictures, tables and more.
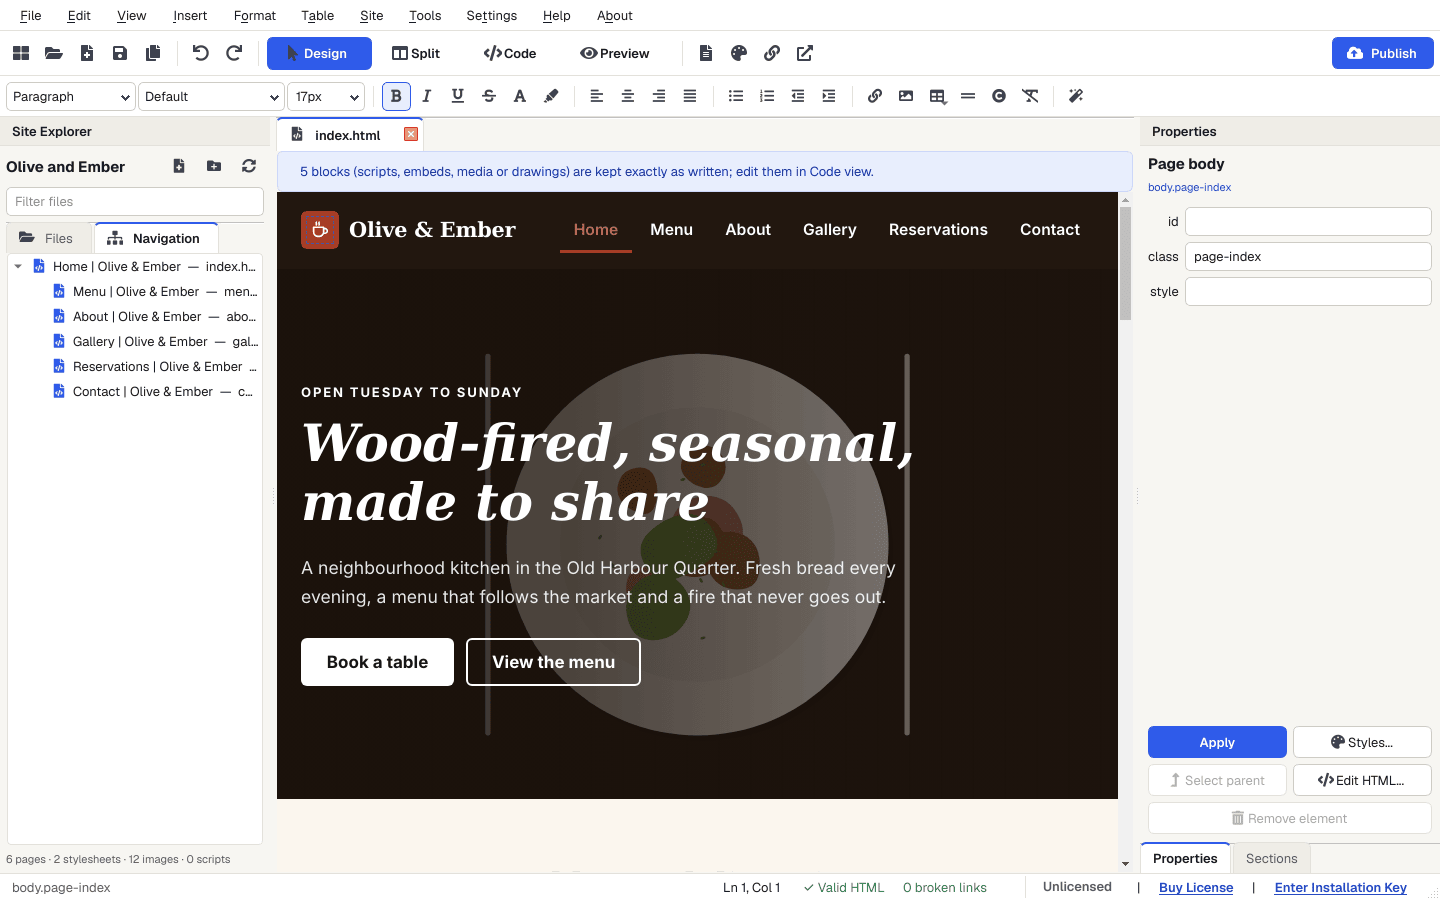
- 4Site Explorer - every page, stylesheet, script and picture in your website. The Navigation tab shows how pages link together.
- 5The page - your real page, drawn by a modern browser engine. Click anywhere and type.
- 6Properties - what's selected and its id, class and style. The Sections tab holds ready-made blocks.
- 7Publish - send your website to your web host, a folder or a ZIP file.
- 8Status bar - cursor position, whether the HTML is valid, broken links, and your licence (Licensed / Unlicensed with Buy License and Enter Installation Key).
Your first website
Start from a template
- Choose File › New Website from Template (Ctrl+Shift+N).
- Browse the 30 designs. Use the search box, the category list on the left, or tick Favourites only. Click a design to see a large preview and the pages it includes.
- Type your Website name, check where it will be saved (Save in), and click Create website.
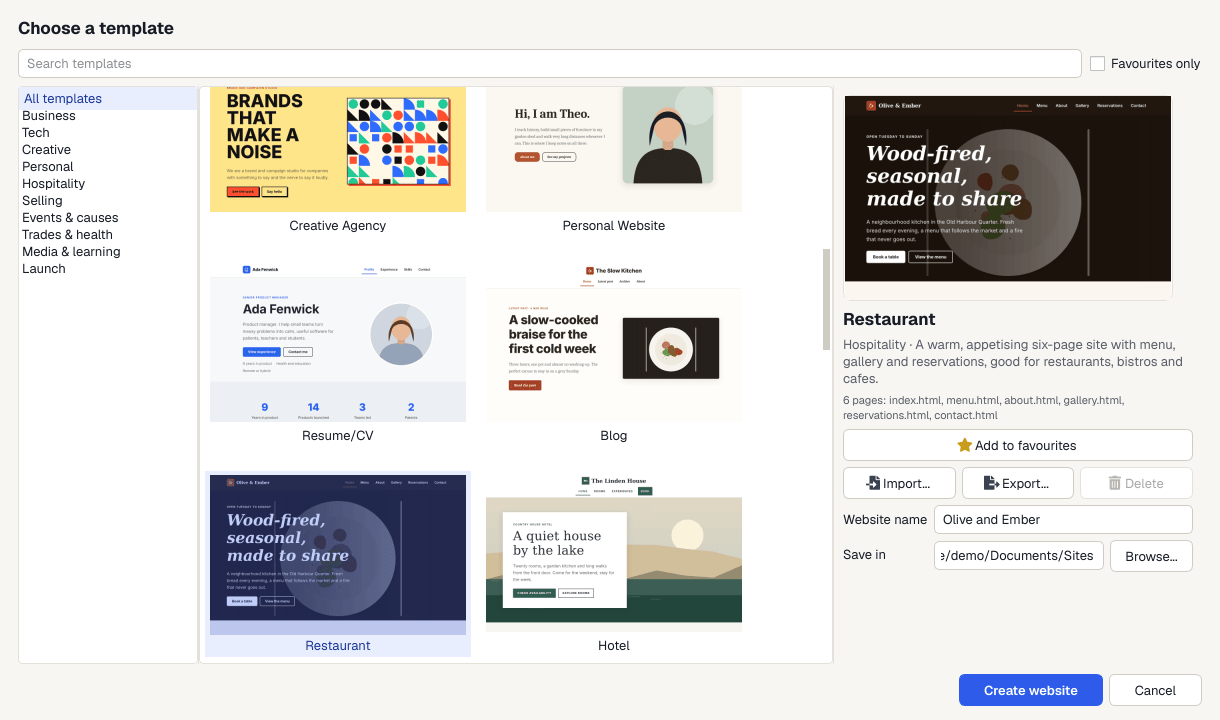
Every template is a complete, responsive website: real pages, one stylesheet and its own pictures - no frameworks, no tracking and nothing loaded from other websites. Replace the sample words and pictures with your own.
Other ways to start
- File › New Blank Website - one empty page and a stylesheet.
- File › Open Website Folder (Ctrl+Shift+O) - edit a website you already have on your PC. Apollo Editor works directly on your files; there's no project file and nothing is converted.
- File › Import Website ZIP - unpack a website backup (for example one downloaded from your host) into a folder and open it.
- File › Open File (Ctrl+O) - open a single HTML, CSS or JavaScript file.
Apollo Editor reopens the last website when it starts. You can change that in Settings.
Editing in Design view
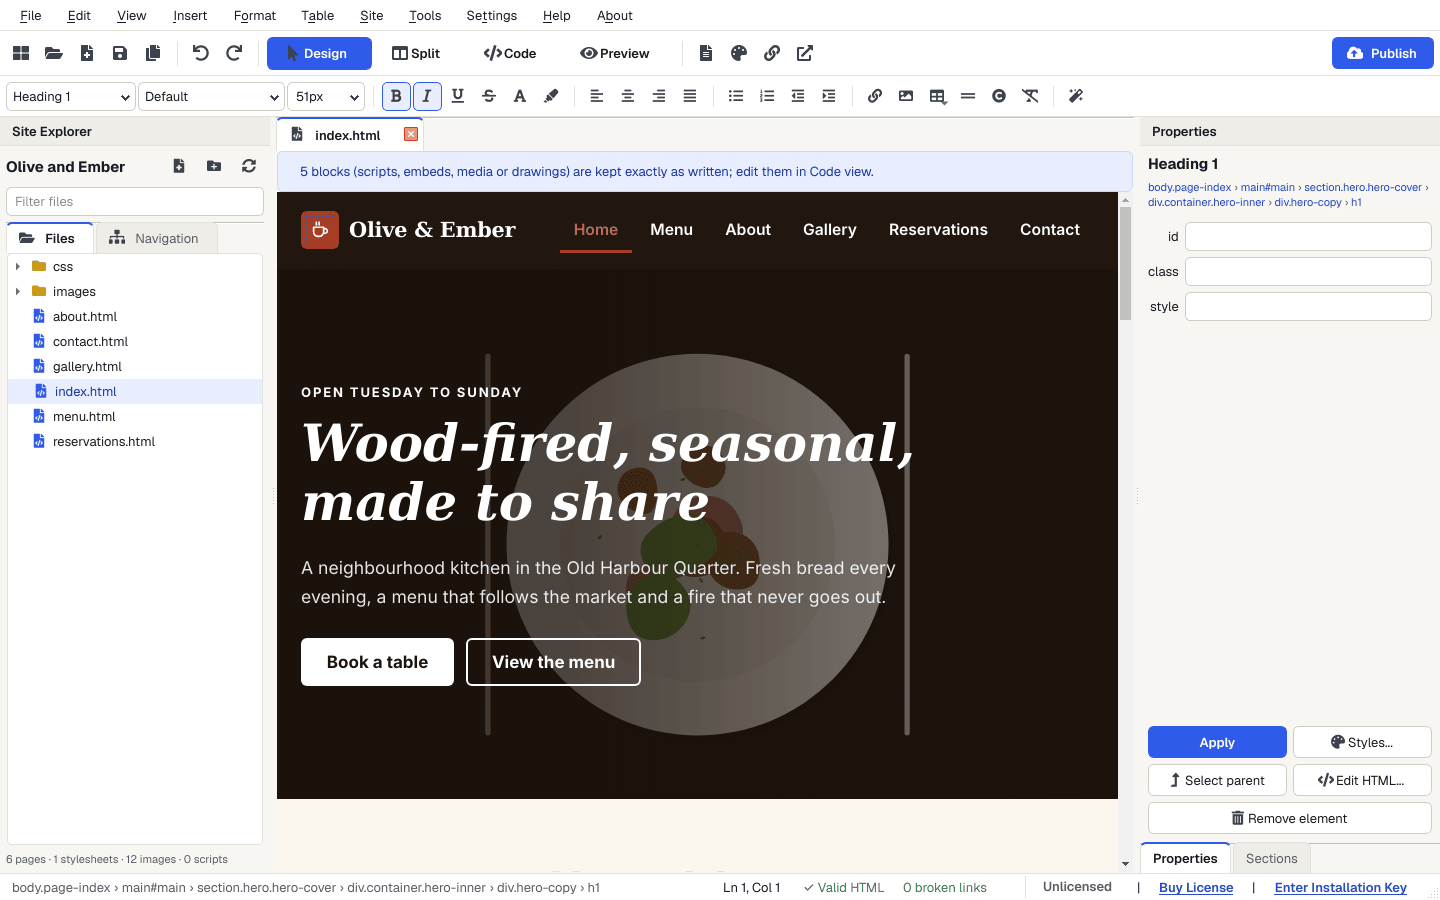
Design view shows the real page. Click on any text and type, just like a word processor.
Formatting text
- Paragraph style (the first box on the formatting toolbar) turns the current block into a heading (Heading 1-6), paragraph, quote or preformatted text.
- Font and size, bold (Ctrl+B), italic (Ctrl+I), underline (Ctrl+U), strikethrough, superscript and subscript are on the toolbar and in the Format menu.
- Text Colour and Highlight Colour; alignment (Ctrl+L, E, R, J); bulleted and numbered lists; indent and outdent (Ctrl+] / [).
- Format › Remove Formatting (Ctrl+Space) clears it again.
- Shift+Enter adds a line break inside a paragraph.
Pasting
Paste (Ctrl+V) keeps headings, lists, links, bold and italic from a document or web page, and removes the clutter word processors add. Edit › Paste as Plain Text (Ctrl+Shift+V) pastes just the words.
The Properties panel
The panel on the right shows the selected element and its place in the page (for example main › section › h1 - click a part to select it). Change its id, class or style and click Apply. Styles... opens the CSS Style Designer, Select parent selects the block around it, Edit HTML... lets you change that one element's code, and Remove element deletes it. Right-click in the page for the same commands plus table and link options.
Undo
Everything can be undone with Ctrl+Z and redone with Ctrl+Y.
Protected blocks and read-only pages
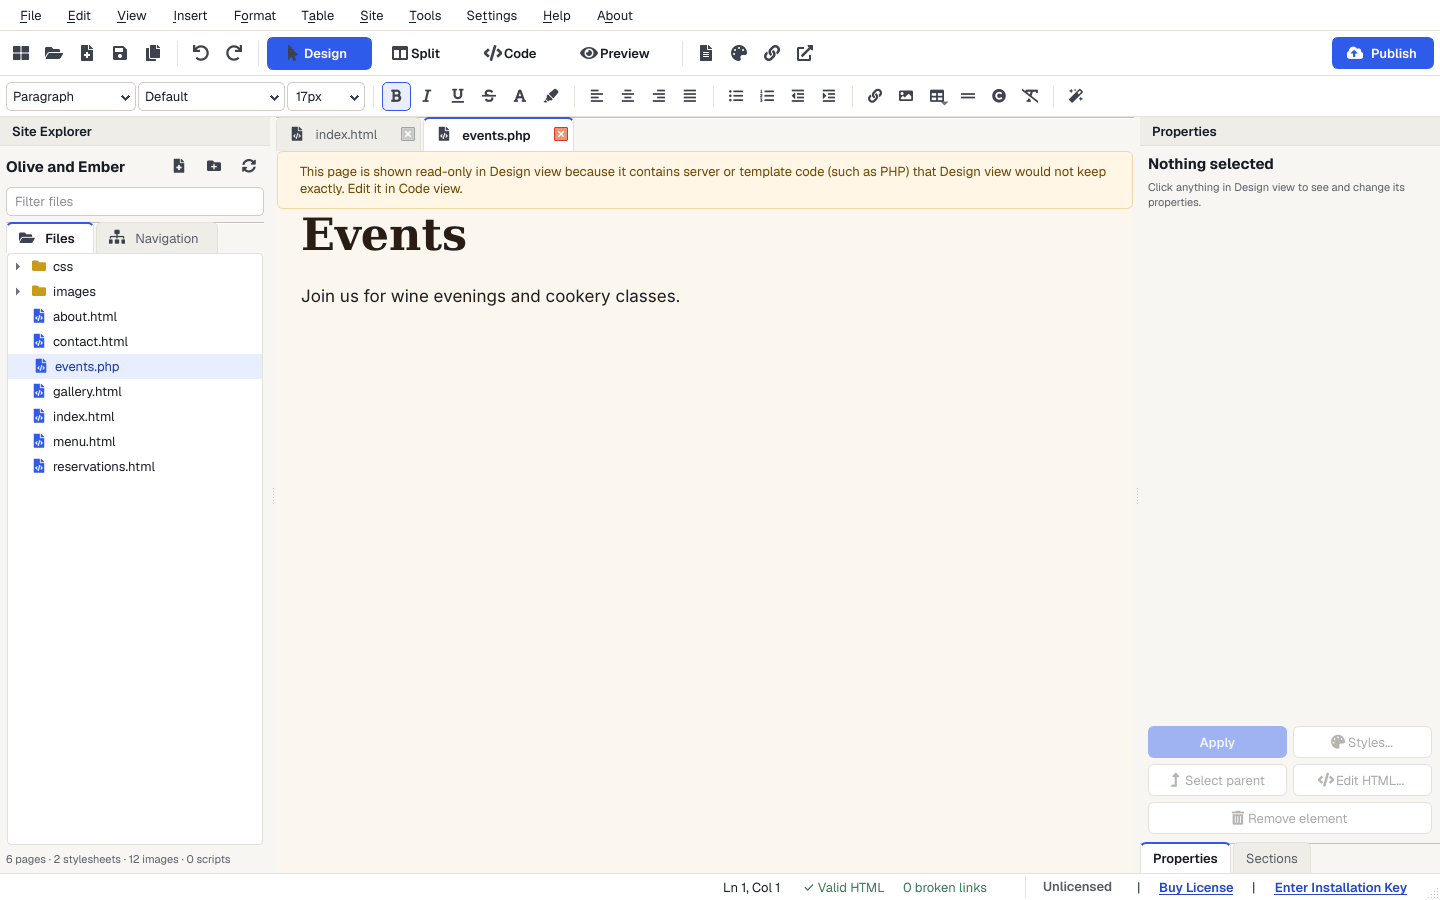
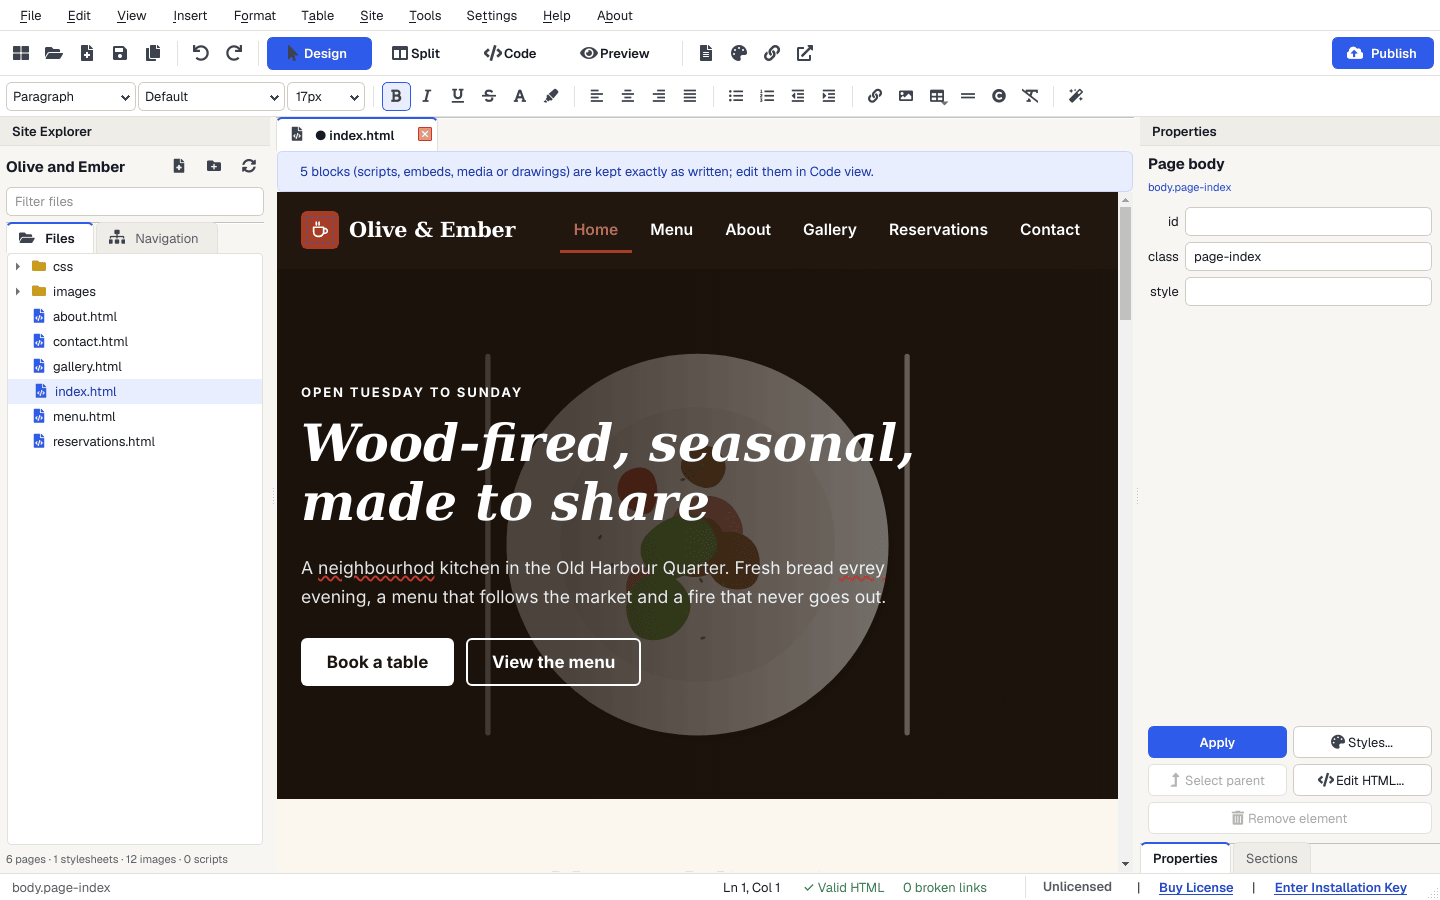
Your code is never quietly rewritten. Scripts, embedded content (maps, videos from other sites), media and drawings are shown as protected blocks - you'll see a blue note such as "5 blocks (scripts, embeds, media or drawings) are kept exactly as written". Edit those in Code view.
Pages that contain server code (such as PHP) or content built by JavaScript open read-only in Design view, with a yellow note explaining why. Edit them in Code view; Preview still works.
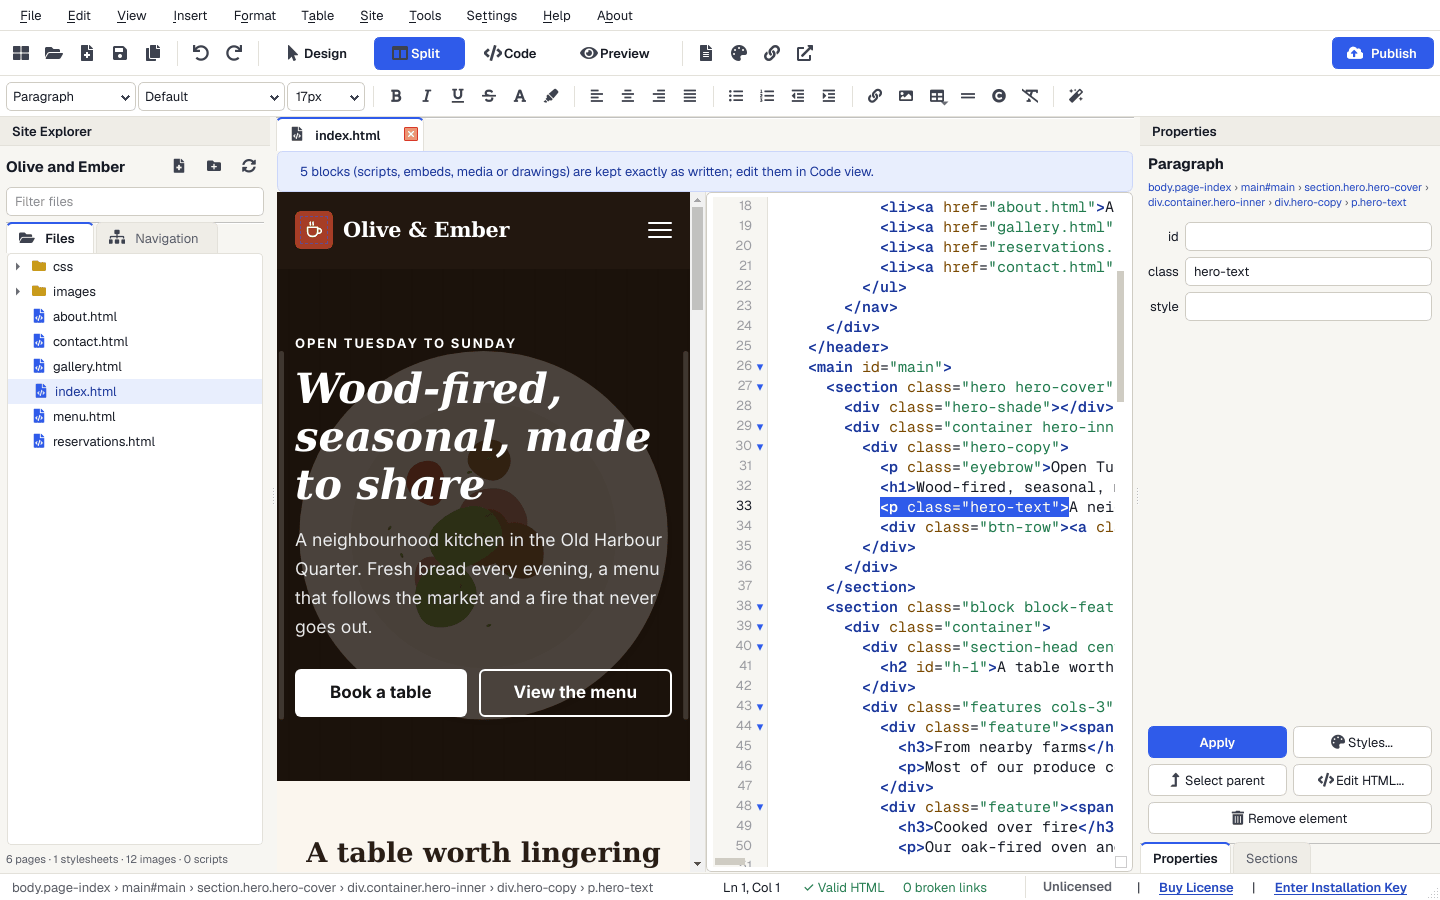
Split, Code & Preview
Split view (Ctrl+2)
The page and its code side by side. Click in the page and the matching code is highlighted; change the code and the page updates as you type.
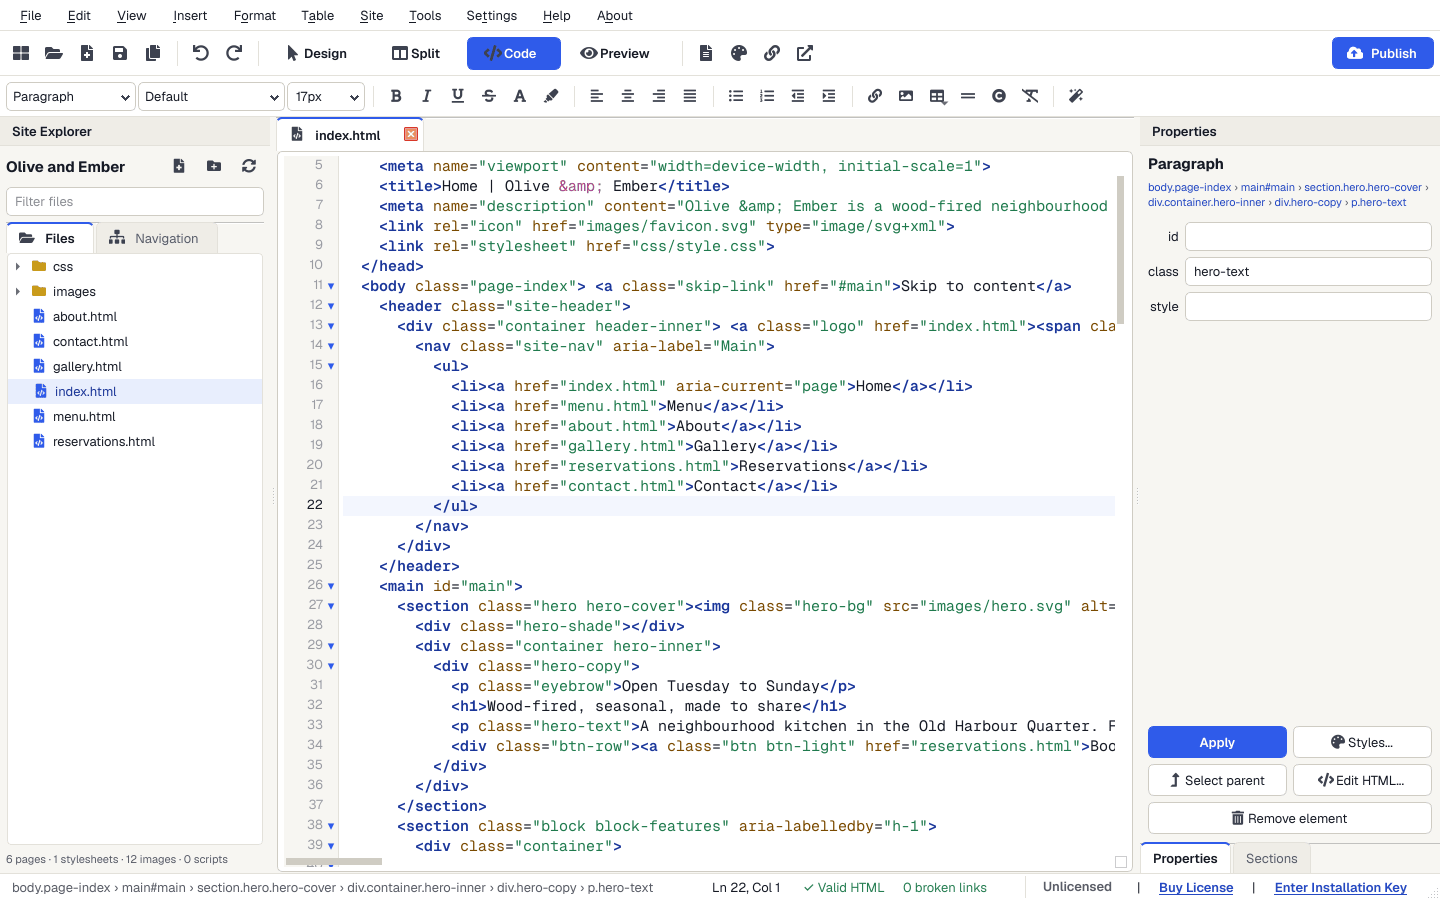
Code view (Ctrl+3)
- Colour highlighting for HTML (including the CSS and JavaScript inside it), CSS and JavaScript, with line numbers.
- Folding - click the small arrows beside the line numbers, or use View › Fold All Code / Unfold All Code.
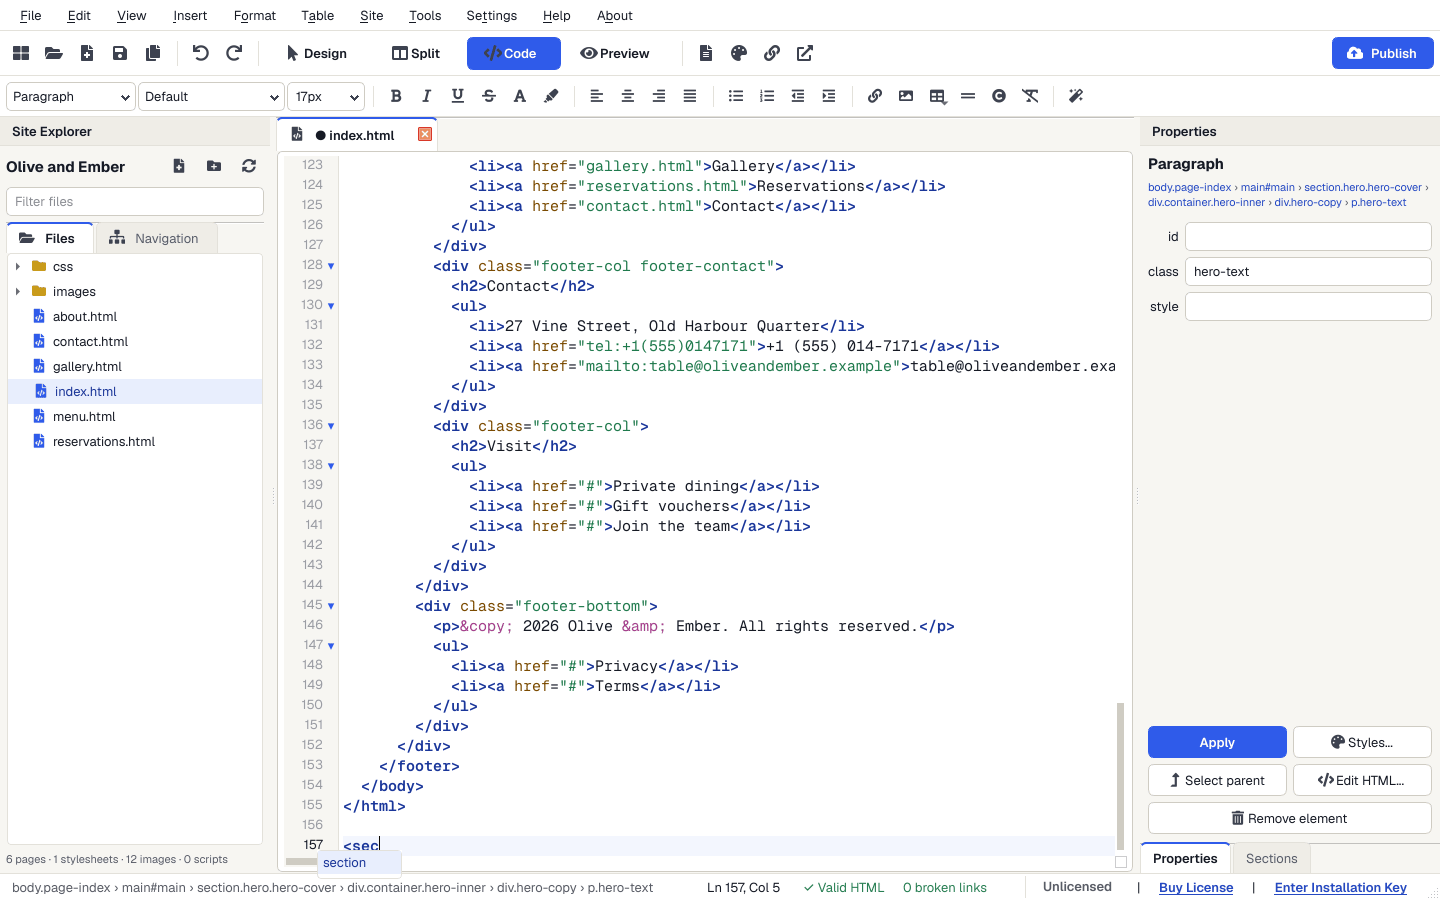
- Autocomplete - suggestions for tags, attributes and CSS properties as you type; closing tags are added automatically.
- Matching brackets and tags are highlighted. Find (Ctrl+F), Replace (Ctrl+H) and Go to Line (Ctrl+G).
- Format › Format Code (Ctrl+Shift+B) tidies the indentation. Code inside
<pre>,<code>, scripts and server code is left exactly as it is.
Preview (Ctrl+4)
See the page exactly as visitors will, including scripts - even before you save. Choose Desktop, Tablet, Phone or Custom sizes, rotate the device, and click links to move between your pages. View › Full Screen Preview (F11) fills the screen (Esc to leave), and File › Preview in Browser (F12) opens the page in your own web browser.
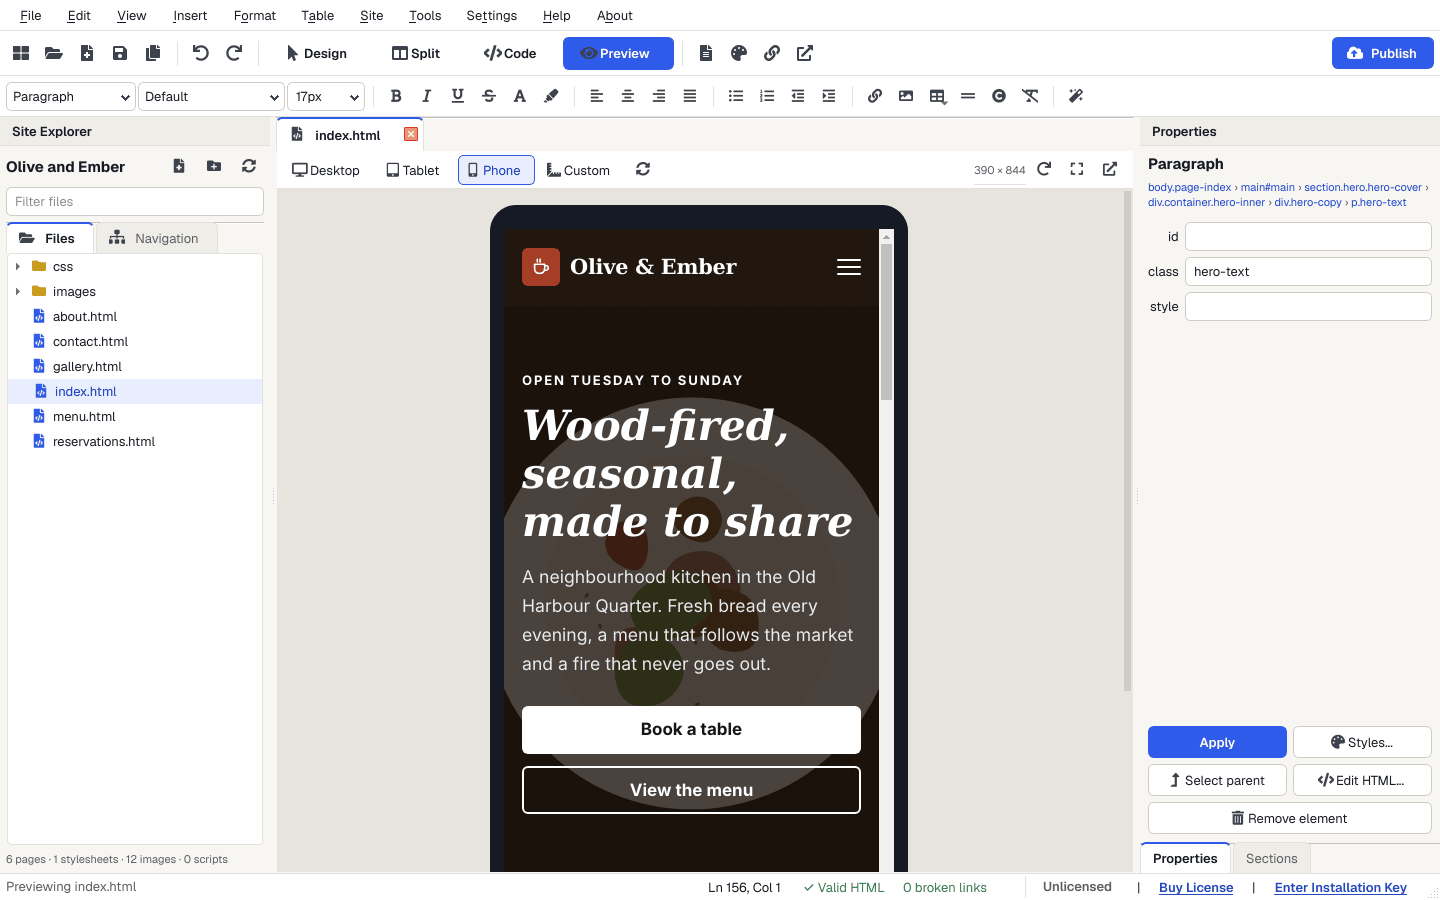
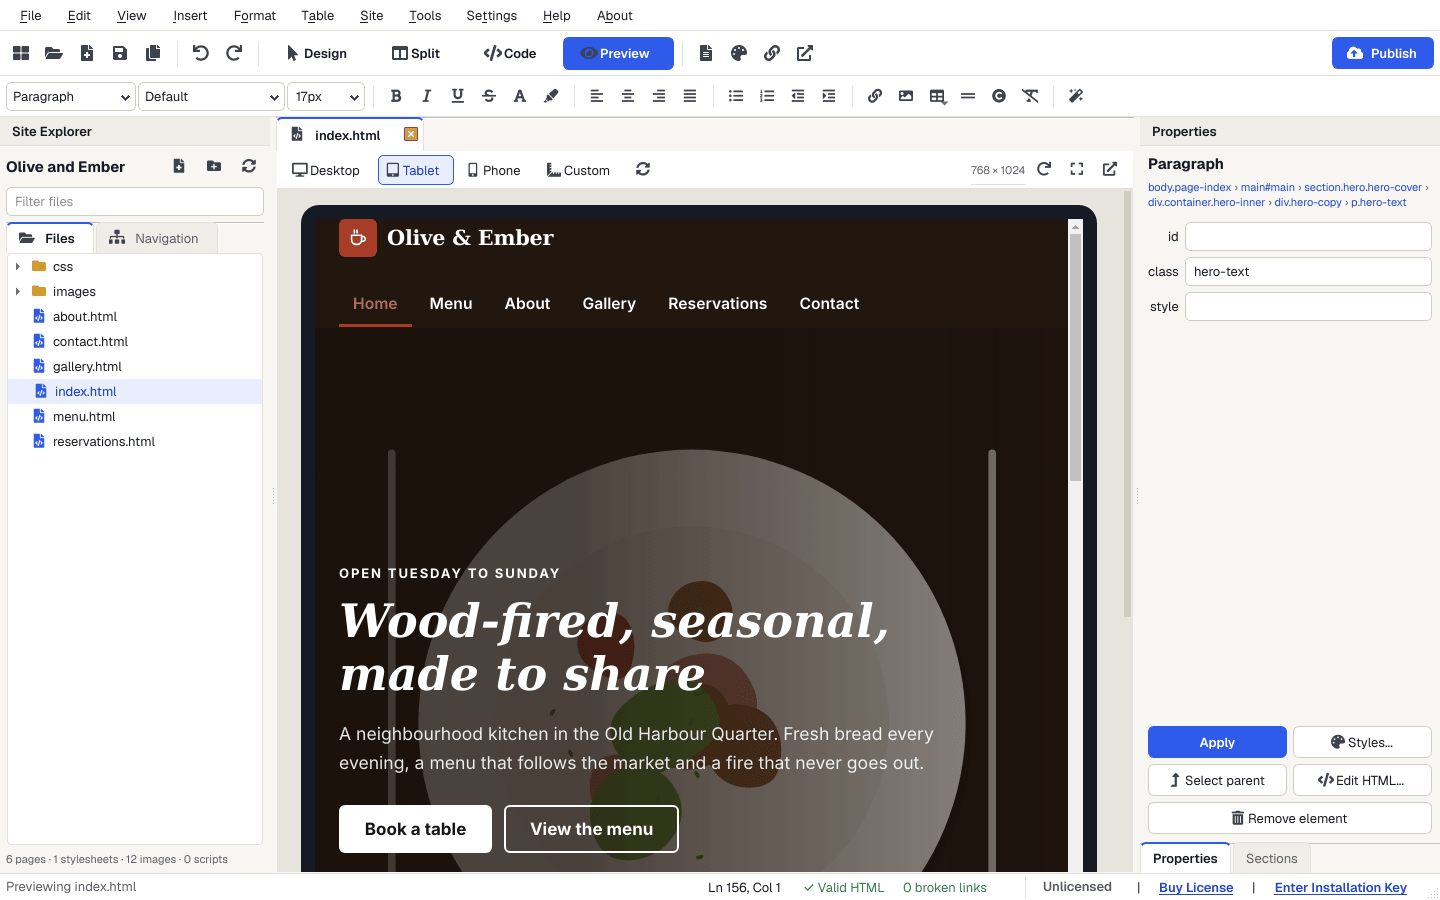
Preview runs pages in a protected sandbox: pages can't open pop-ups, use your camera or microphone, or read files on your PC. Links to other websites open in your own browser.
Pictures & links
Adding a picture
Drag a picture from Windows onto the page, or choose Insert › Image (Ctrl+Shift+I). Pictures from outside your website folder are copied into its images folder for you. JPEG, PNG, GIF, WebP, SVG and AVIF are supported.
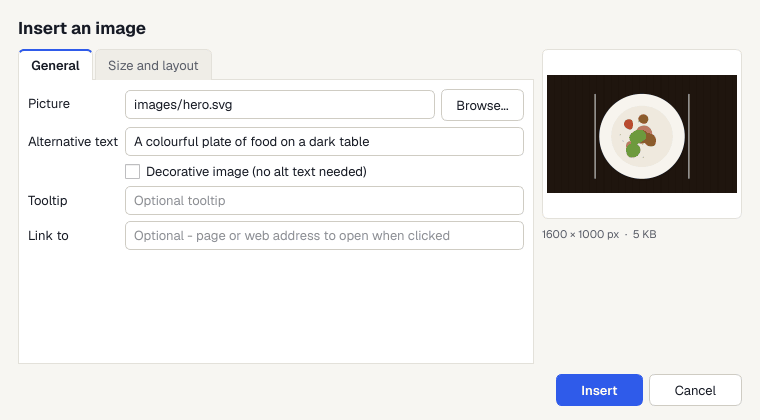
- Alternative text describes the picture for people using screen readers and for search engines. Tick Decorative image if it's only decoration.
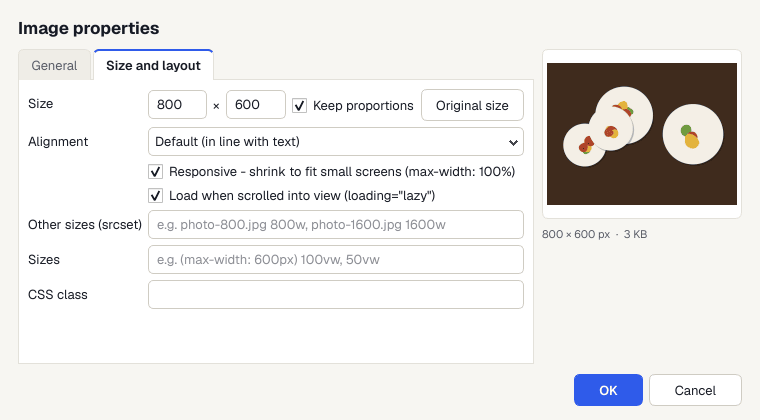
- Size and layout: width and height (keep proportions or go back to the original size), alignment, Responsive (shrinks to fit small screens), Load when scrolled into view, and optional
srcset/sizesfor different screen sizes. - Double-click a picture on the page to change its properties later.
Links
Select some words and choose Insert › Hyperlink (Ctrl+K). Link to a page in your website, a page on another website, an email address (with an optional subject), a phone number, a bookmark on a page, or a file to download. Apollo Editor writes the right relative path for you, and keeps links working when you move or rename pages (see Managing your website).
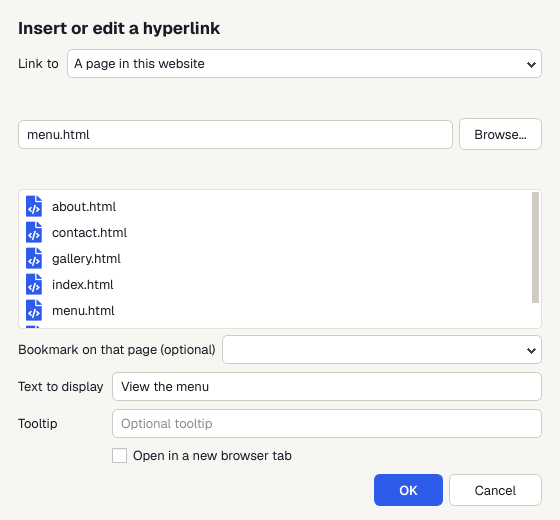
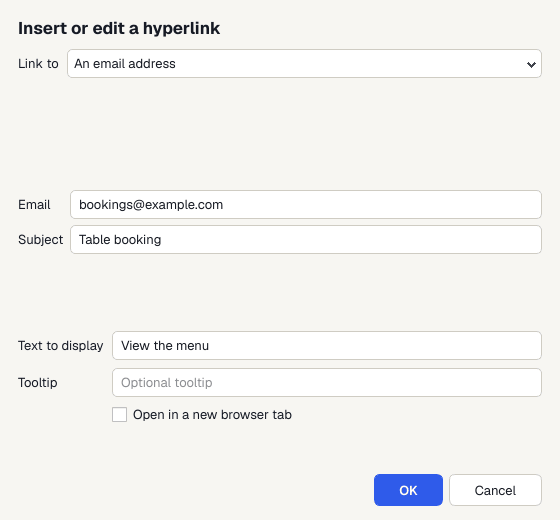
Insert › Bookmark adds a named spot on a page that links can jump to. Insert › Remove Hyperlink removes a link but keeps the words.
Buttons, forms & media
The Insert menu adds everything else a page needs:
- Heading, Paragraph, Line Break and Horizontal Line.
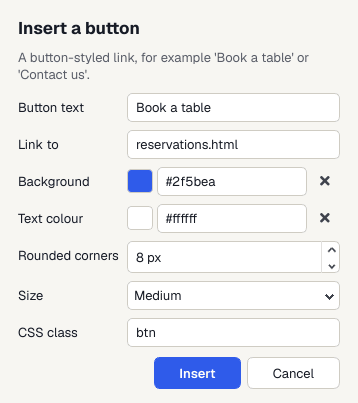
- Button - a button-style link such as "Book a table", with colours, rounded corners and size.
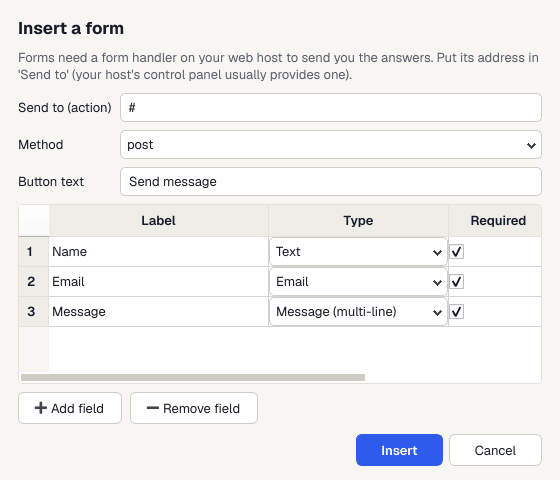
- Form - a contact or sign-up form. Add fields (text, email, phone, number, date, message, drop-down list or checkbox) and mark them required. Forms need a form handler on your web host to send the answers; put its address in Send to (action) - your host's control panel usually provides one.
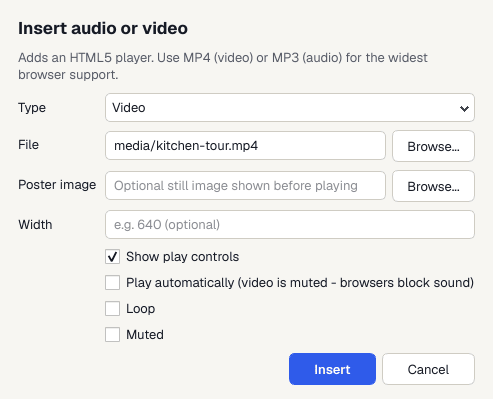
- Audio or Video - an HTML5 player for MP4 video or MP3 audio, with a poster picture, controls, loop and muted options.
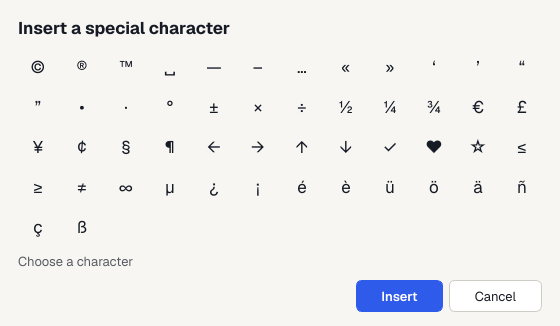
- Special Character - ©, ™, €, £, arrows, accented letters and more.
- HTML - paste a snippet of code (for example a map or booking widget from another service).
- Section - a ready-made block (see Sections & templates).
Tables
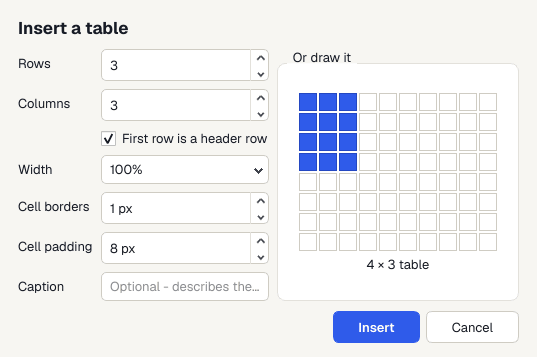
Choose Insert › Table (or the table button on the toolbar). Type the number of rows and columns, or simply draw the size you want on the grid. You can make the first row a header and set the width, borders, padding and a caption.
- The Table menu (and right-click in a table) inserts rows above or below and columns left or right, deletes rows, columns or the table, merges selected cells, splits a cell, turns header cells on and off, and makes columns evenly wide.
- Drag a column edge in Design view to resize it.
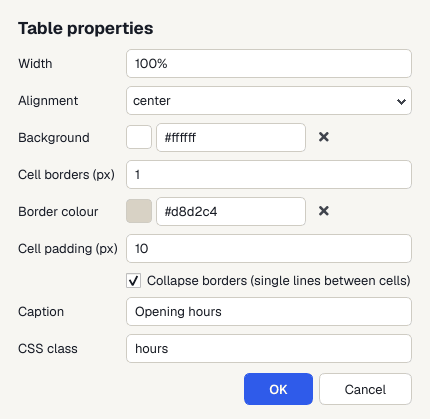
- Table Properties and Cell Properties set width, alignment, background, borders, border colour, padding, caption and CSS class.
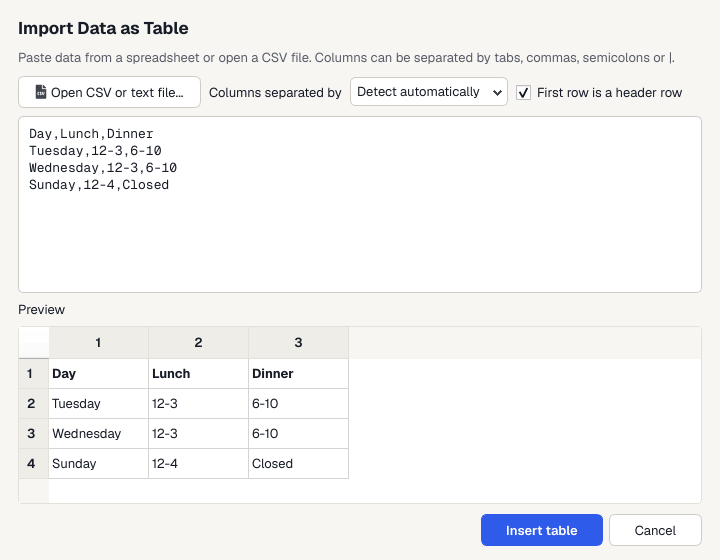
- Table › Import Data (CSV) turns spreadsheet data into a table - open a CSV file or paste cells straight from Excel. Convert Text to Table and Convert Table to Text work on the selection.
Styling with CSS
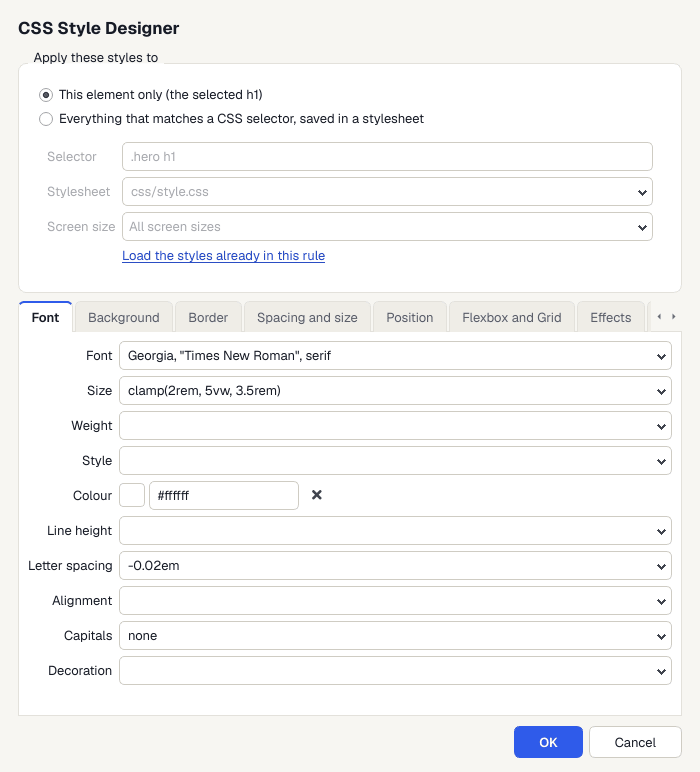
The CSS Style Designer (Format › CSS Style Designer, Ctrl+Shift+Y, or Styles... in the Properties panel) styles things without memorising CSS.
Where the styles go
- This element only - styles just the selected element.
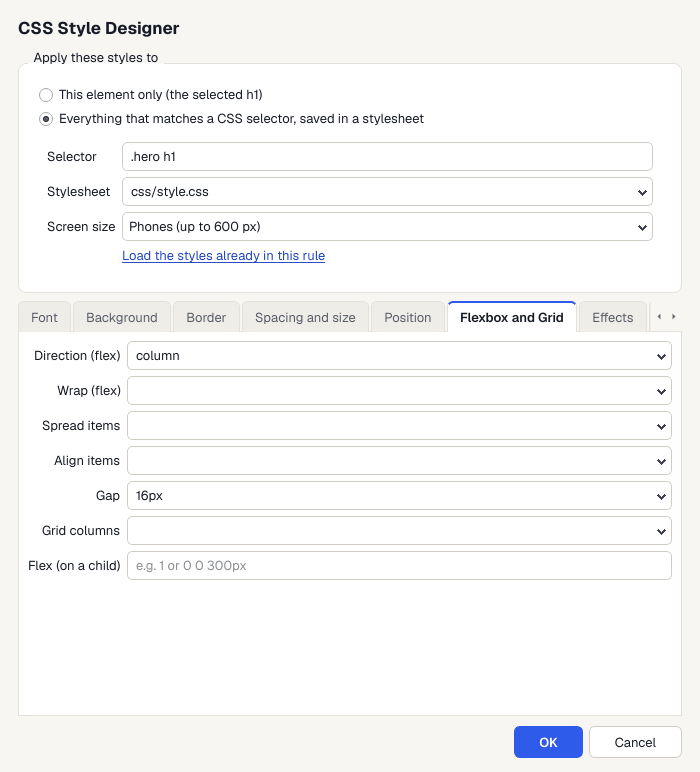
- Everything that matches a CSS selector - for example
.hero h1or a class name - saved in one of your stylesheets, so every matching element on every page changes. Click Load the styles already in this rule to start from what's there. - Screen size - choose Tablets and smaller (up to 1024 px) or Phones (up to 600 px) to add the styles inside a media query, so they apply only on smaller screens.
What you can set
Font, size, weight, colour, line height, letter spacing and capitals; backgrounds (colour, picture and gradient); borders and rounded corners; margins, padding, width and height; position; Flexbox and Grid layout; shadows, opacity, transitions and the mouse pointer.
To hand-edit a stylesheet, double-click it in the Site Explorer, or choose Format › Edit Stylesheet to open the page's stylesheet in Code view.
Sections & templates
Sections
The Sections tab (beside Properties, or Insert › Sections Library) holds 20 ready-made, responsive blocks: header, navigation bar, two heroes, gallery, feature cards, pricing table, testimonials, accordion, tabs, FAQ, contact form, two footers, call to action, features with icons, team, stats, image + text and newsletter sign-up. Drag one onto the page, or double-click it to add it after the current block. Its styles and pictures are copied into your website for you.
Your own templates
- Tools › Save Page as Template saves the current page (with its stylesheets and pictures) to use again.
- Tools › Template Library lists the built-in and your own templates; you can mark favourites and import or export templates as ZIP files to share them.
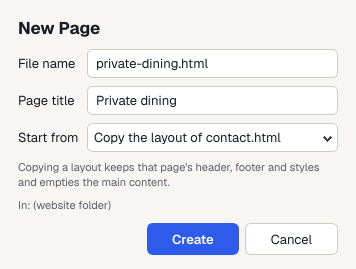
- File › New Page (Ctrl+N) can copy the layout of an existing page - you get its header, footer and styles with the main content emptied.
Page properties & SEO
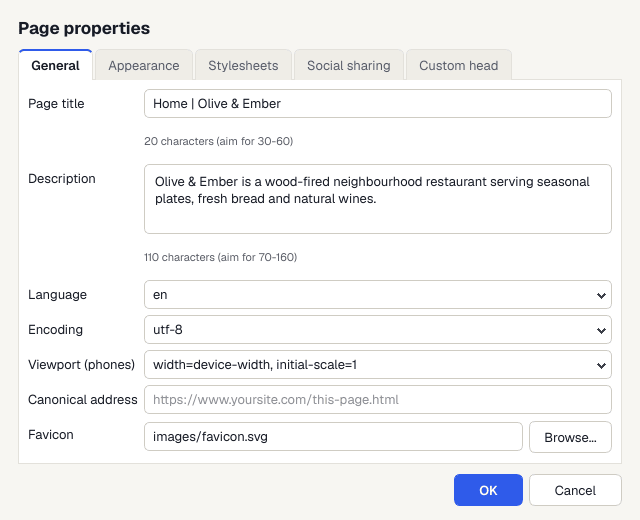
File › Page Properties (Alt+Enter) controls everything in the page's <head> - only what you change is touched.
- General: page title and description (with a character count for search results), language, encoding, viewport for phones, canonical address and favicon.
- Appearance: page background colour or picture, and the default font, size and colour.
- Stylesheets: add, remove and order the stylesheets the page uses.
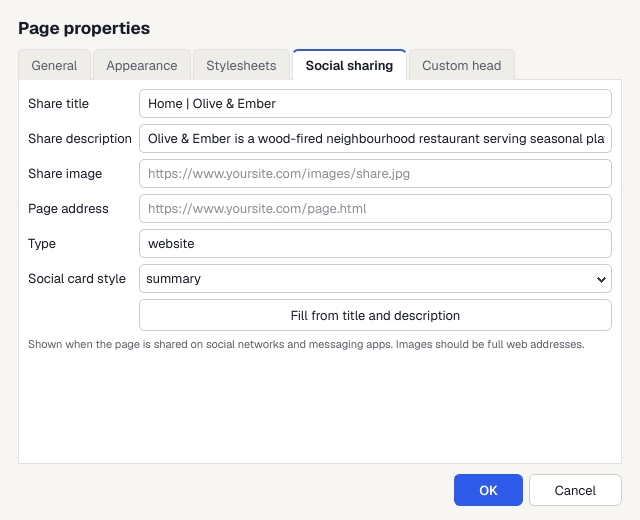
- Social sharing: the title, description and picture used when the page is shared (Open Graph and social cards). Fill from title and description copies them for you.
- Custom head: anything else, such as verification or analytics code.
Managing your website
The Site Explorer
Double-click a file to open it. Right-click for New Page, New Stylesheet, New Folder, Add Files to Site, Rename (F2), Move to Folder, Duplicate, Delete, Copy Relative Path, Show in Explorer and more. You can also drag files between folders. Type in Filter files to find a file quickly.
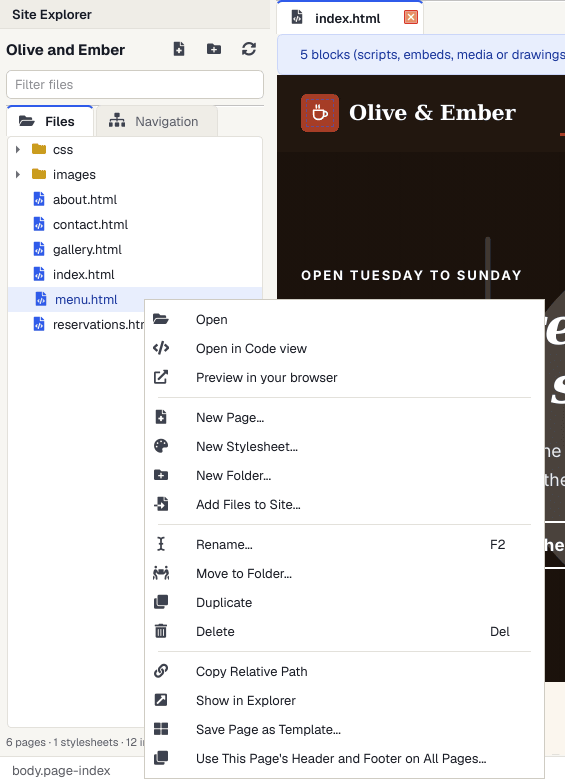
Rename and move without breaking links
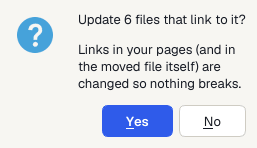
When you rename or move a page, picture or folder, Apollo Editor finds every page that links to it and offers to update those links - including links inside the moved file itself. Click Yes and nothing breaks. (You can make this automatic in Settings › Links.)
Delete sends files to the Windows Recycle Bin, and warns you first if other pages link to them.
Navigation tree
The Navigation tab in the Site Explorer (or Site › Navigation Tree) shows how your pages link to each other, starting from your home page; the status bar then lists any pages that can't be reached from the home page.
Shared header and footer
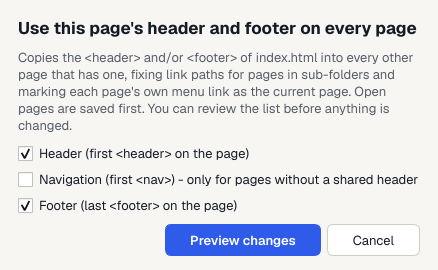
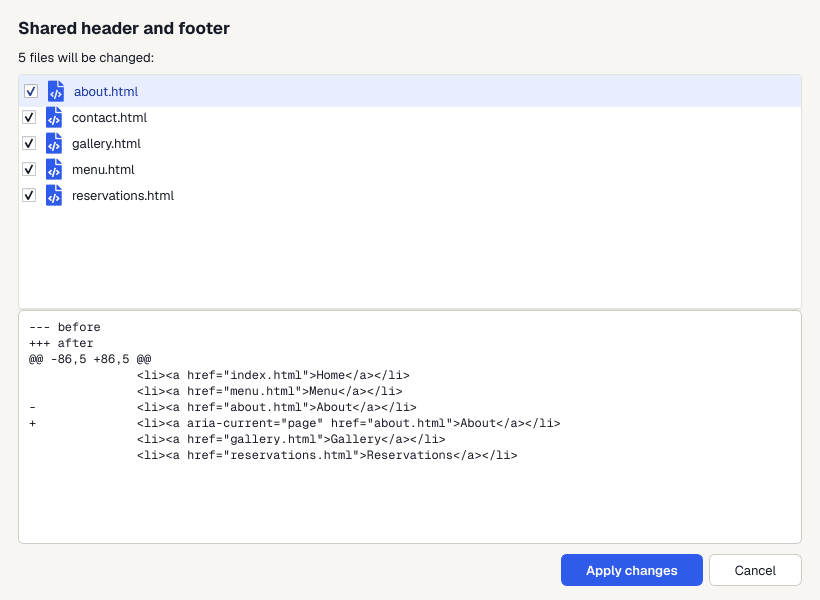
Change the header or footer on one page, then choose Site › Shared Header and Footer to copy it to every other page. Link paths are fixed for pages in sub-folders and each page's own menu link is marked as the current page. You see the list of changes - and exactly what will change in each file - before anything is saved.
Find and replace across the website
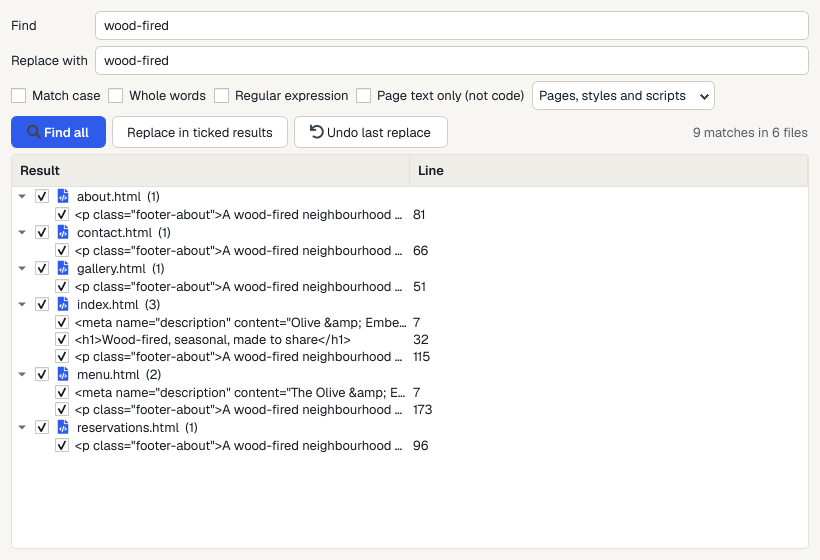
Edit › Find and Replace in Site (Ctrl+Shift+F) searches every page, stylesheet and script. Choose match case, whole words, regular expressions, or page text only (skips the code). Untick any results you don't want to change, then Replace in ticked results. Undo last replace puts everything back.
Sitemap
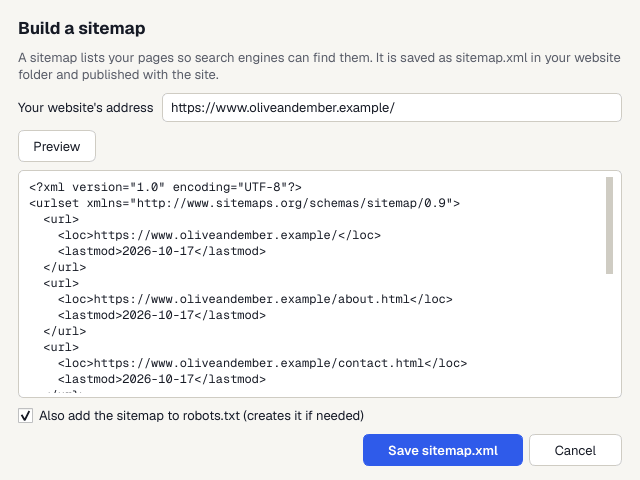
Site › Build Sitemap creates sitemap.xml so search engines can find all your pages. Enter your website's address, preview it, and optionally add it to robots.txt.
Checking your work
Broken links
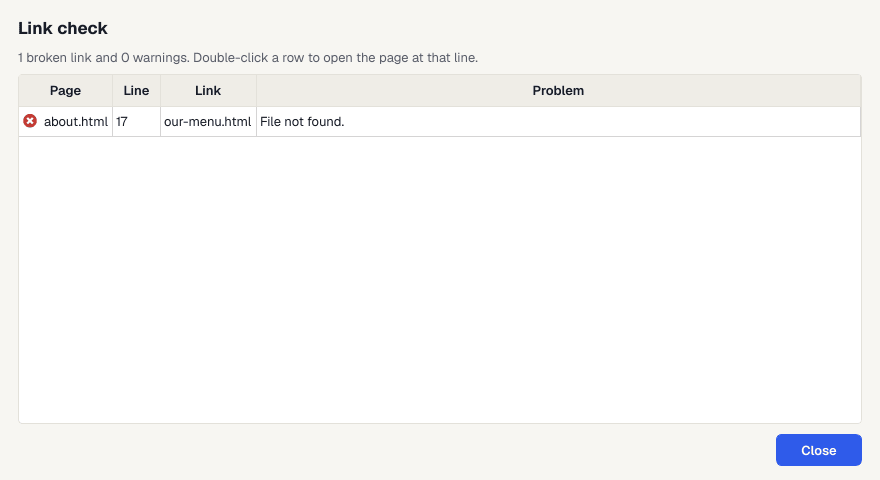
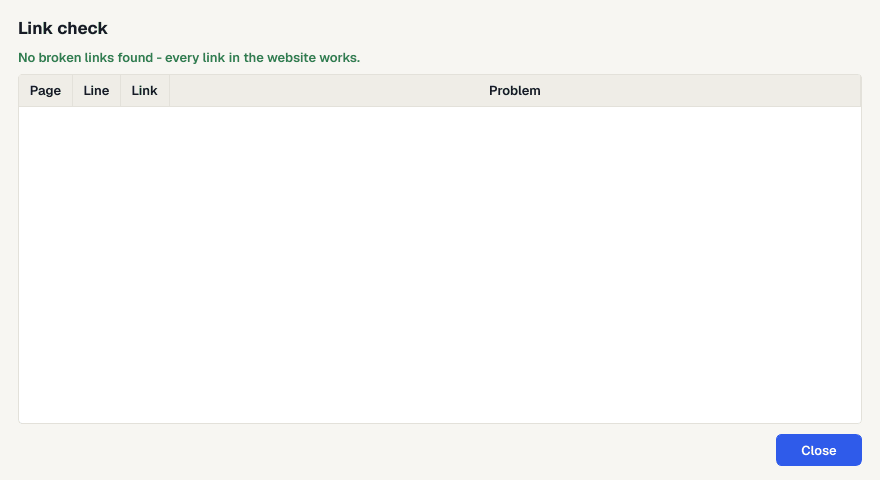
Site › Check Links (Ctrl+Shift+L) checks every link, picture, stylesheet and script in the whole website. Double-click a problem to open the page at that line. The status bar always shows the number of broken links.
Validation
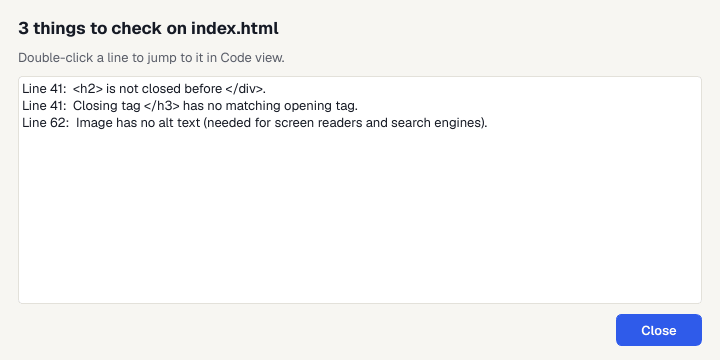
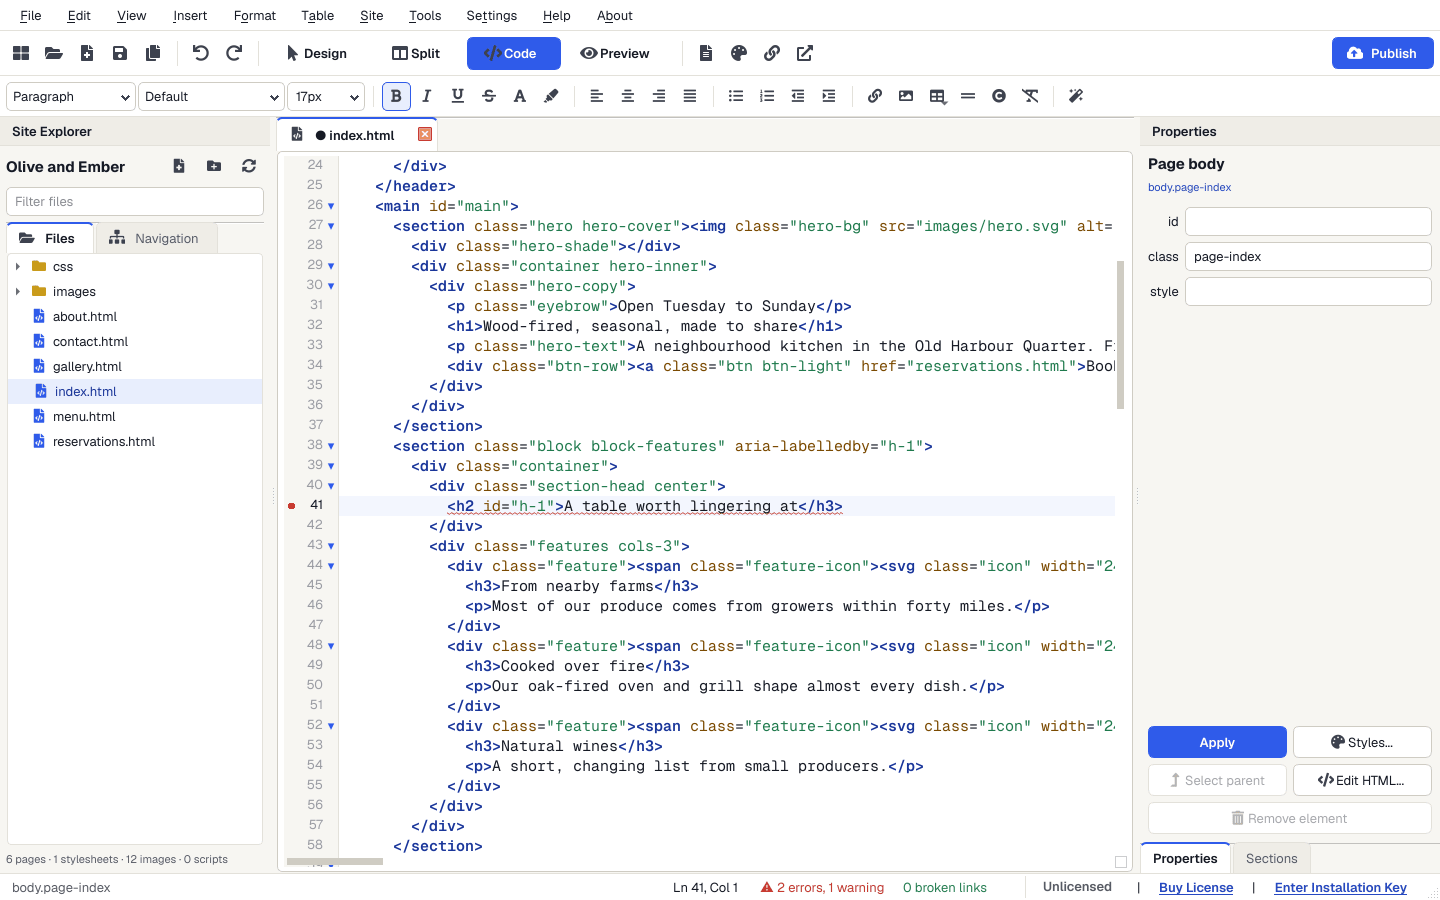
Tools › Validate Page (F6) checks the page's HTML and CSS: unclosed or mismatched tags, missing alt text, duplicate ids, missing title and more. Problems are also marked beside the line numbers in Code view, and the status bar shows Valid HTML or the number of errors and warnings.
Spelling
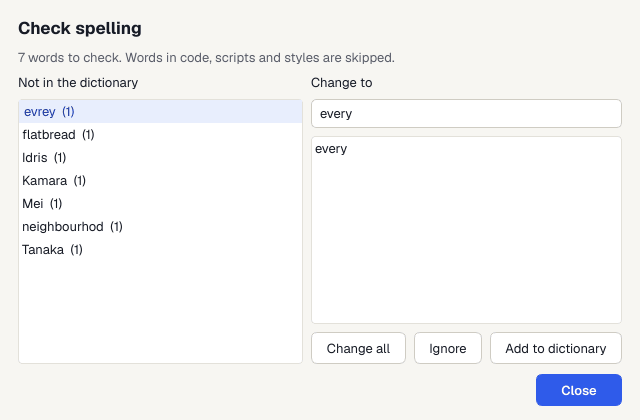
Misspelled words are underlined in red in Design view as you type (right-click one for suggestions). Tools › Check Spelling (F7) goes through the whole page: Change all, Ignore or Add to dictionary. Both British and American spellings are accepted; words in code, scripts and styles are skipped.
Publishing
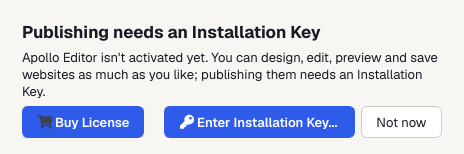
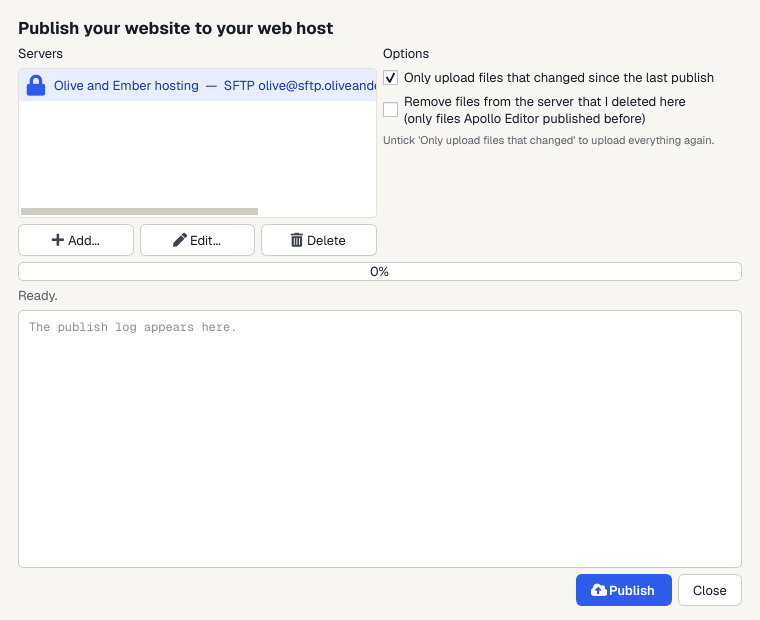
Click Publish (or File › Publish Website, Ctrl+Shift+P) to put your website online. Publishing needs an activated Installation Key.
Add your web host's details (once)
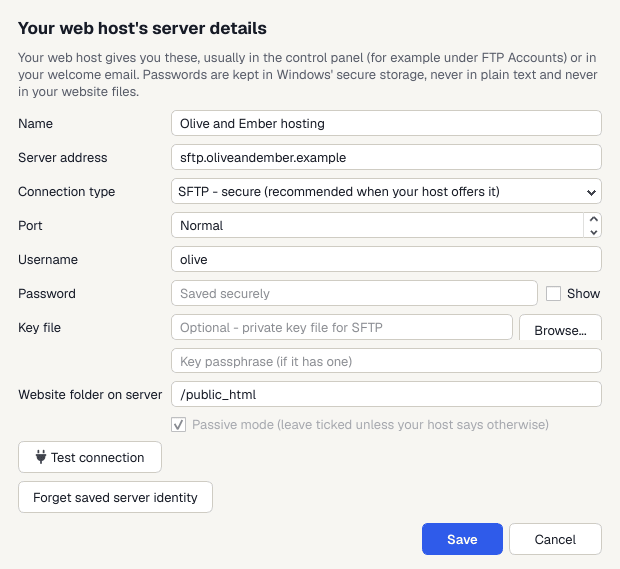
- In the Publish window click Add....
- Enter a Name for this server, the Server address (for example
ftp.yourwebsite.com), the Connection type, your Username and Password, and the Website folder on server (often/public_htmlor/www). - Click Test connection, then Save.
| Connection type | When to use it |
|---|---|
| SFTP | Recommended when your host offers it. Everything is encrypted. You can sign in with a password or a private key file. |
| FTPS | FTP with encryption (TLS). Encrypted; offered by most shared hosting. |
| FTP | Only if your host offers nothing else - the password and files are not encrypted. |
Your password is kept in Windows' secure storage (Credential Manager) - never in a plain text file.
Publish
Pick the server and click Publish. Open pages are saved first. With Only upload files that changed since the last publish ticked (the normal choice), republishing is quick. Untick it to upload everything. Remove files from the server that I deleted here only ever removes files Apollo Editor published before - never anything else on your server. You can follow the progress and the log, and every file's size is checked after it's uploaded. Cancel stops safely.
Publish to a folder or a ZIP
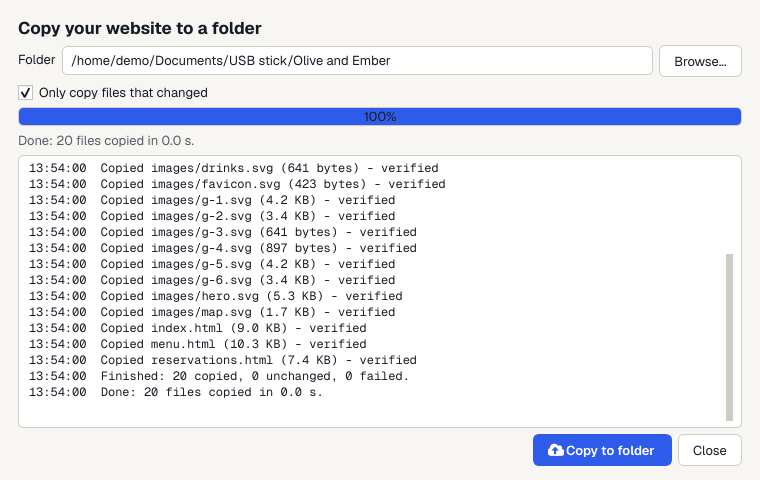
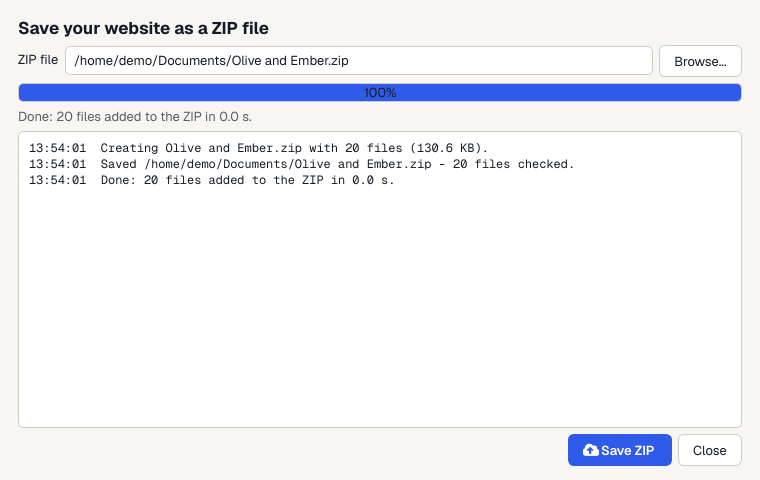
File › Publish to a Folder copies the website to a folder - a USB stick, a network drive or a folder your host syncs. File › Export Website as ZIP makes a single ZIP file, handy for backups or sending to someone. Neither needs a server.
Security messages
"Trust this server?" (first SFTP connection)
"The server's identity has changed" / "Security certificate changed"
Certificate warnings on FTPS
Saving & recovery
- Save (Ctrl+S), Save As (Ctrl+Alt+S) and Save All (Ctrl+Shift+S). A dot on the page's tab means it has unsaved changes. Files keep their original encoding and line endings.
- Autosave can save changed pages for you every few seconds or minutes (see Settings).
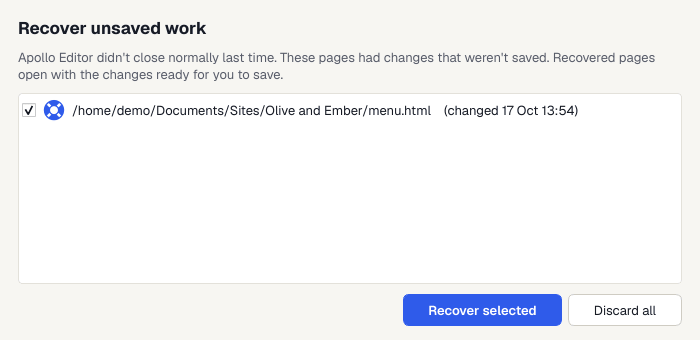
- Crash recovery: unsaved changes are copied in the background. If Apollo Editor or Windows stops unexpectedly, you're offered your work back the next time it starts.
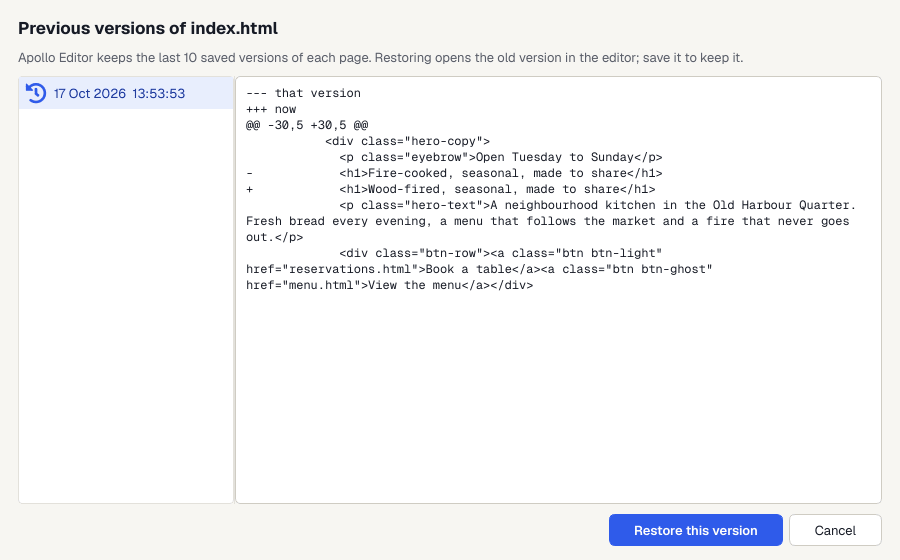
- Previous versions: the last 10 saved versions of every page are kept. File › Previous Versions shows each one and exactly what changed; Restore this version opens it in the editor for you to save.
- File › Revert to Saved throws away changes since the last save.
Settings
Choose Settings › Default Settings.
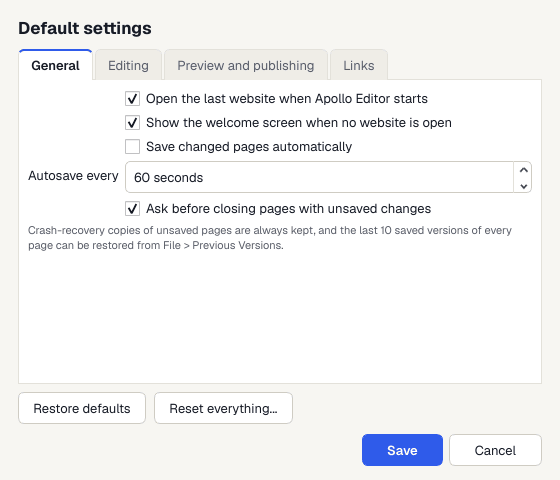
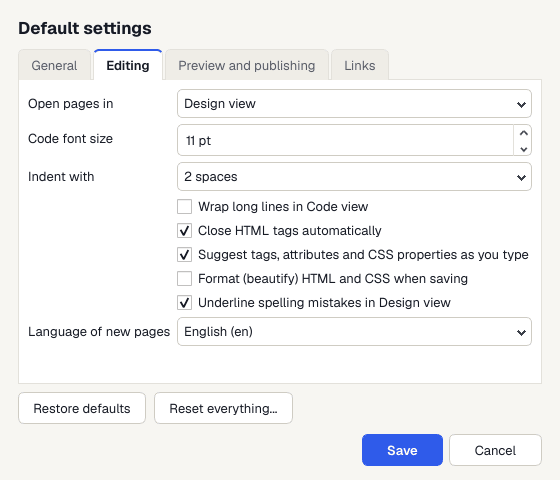
| Tab | Settings |
|---|---|
| General | Open the last website when Apollo Editor starts; show the welcome screen; save changed pages automatically, and how often; ask before closing pages with unsaved changes. |
| Editing | Which view pages open in; code font size; indent with 2 or 4 spaces; wrap long lines; close HTML tags automatically; suggestions as you type; format HTML and CSS when saving; underline spelling mistakes; language of new pages. |
| Preview and publishing | The device size Preview starts at (desktop, tablet, phone or a custom width and height); publish only files that changed; ask before uploading the whole website again. |
| Links | When you rename or move a file: ask before updating links, always update them, or never update them. |
Restore defaults puts the settings back as they were when installed. Reset everything... also clears recent websites, recent files and favourite templates - your websites, saved servers and licence are not affected.
Your Installation Key
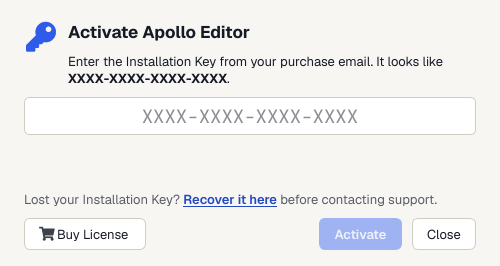
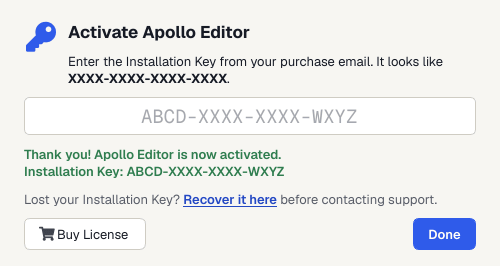
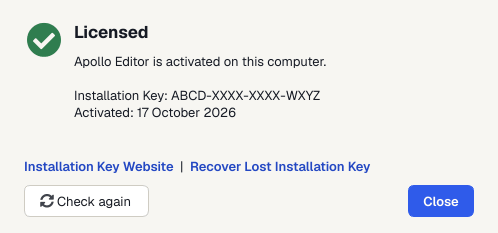
Your Installation Key is in your purchase email. It looks like XXXX-XXXX-XXXX-XXXX. Apollo Editor only ever shows it partly hidden, for example ABCD-XXXX-XXXX-WXYZ.
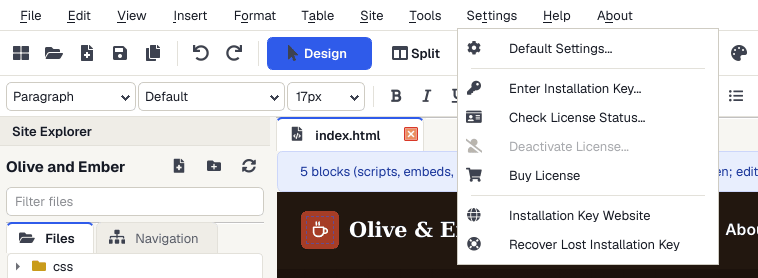
Activate
- Choose Settings › Enter Installation Key (or click Enter Installation Key in the status bar).
- Paste or type the key - the dashes are added for you - and click Activate. You need to be online.
- The status bar changes to Licensed and the Buy License options disappear.
Check, move or recover
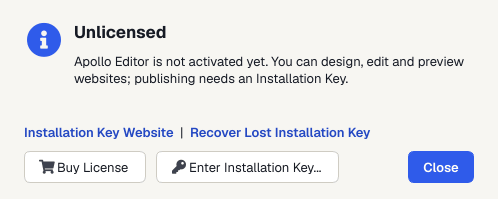
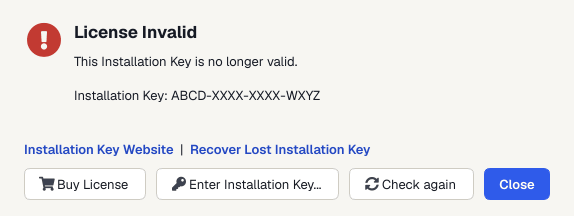
- Settings › Check License Status shows whether this computer is Licensed, Unlicensed or License Invalid, with the masked key and activation date. Check again asks the Installation Key service now.
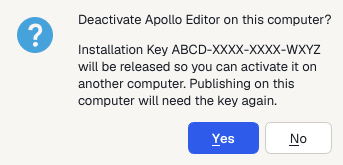
- Moving to a new PC: on the old PC choose Settings › Deactivate License, then activate on the new one. This frees the activation.
- Lost your key? Settings › Recover Lost Installation Key opens installationkey.com/lookup, where the key can be sent to your purchase email address.
- Working offline: once activated, Apollo Editor keeps working offline. It re-checks your key about once a day when it can; if it can't reach the service, nothing changes. After 7 days without a check, it reminds you to connect.
- Buy a licence: Settings › Buy License (shown only while unlicensed) opens apolloeditor.com.
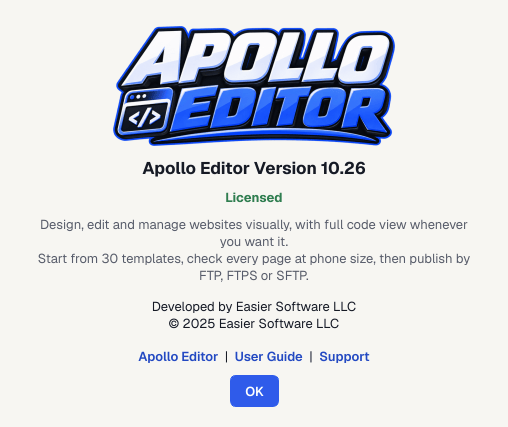
- About › About Apollo Editor shows your version and licence state.
Messages you might see
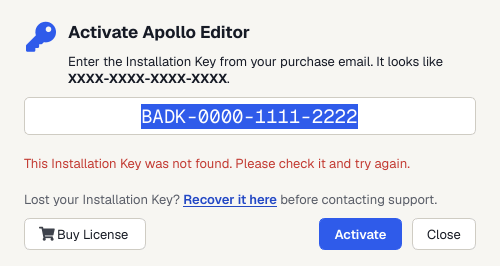
"This Installation Key was not found"
"Already active on the maximum number of computers"
"Apollo Editor couldn't reach the licensing service"
"License Invalid"
Checking for updates
Choose About › Check for Updates. Apollo Editor asks apolloeditor.com for the latest version and shows the result:
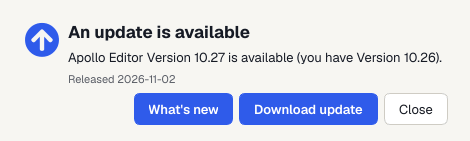
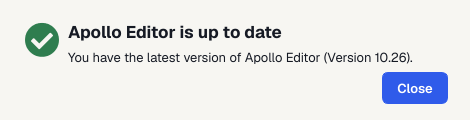
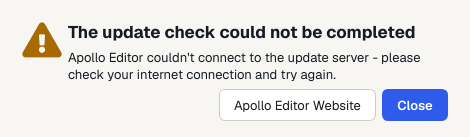
- An update is available - click Download update, run the new installer over the top of your current version. Your websites, settings and activation are kept.
- Up to date - nothing to do.
- Could not be completed - Apollo Editor couldn't get an answer (for example you're offline). It never guesses; try again later.
Keyboard shortcuts
| Keys | What it does |
|---|---|
| F1 | Open this user guide |
| Ctrl+1 / 2 / 3 / 4 | Design / Split / Code / Preview view |
| Ctrl+Shift+N | New website from a template |
| Ctrl+N | New page |
| Ctrl+Shift+O / Ctrl+O | Open a website folder / open a file |
| Ctrl+S / Ctrl+Shift+S | Save / save all |
| Ctrl+W | Close the page |
| Ctrl+Z / Ctrl+Y | Undo / redo |
| Ctrl+Shift+V | Paste as plain text |
| Ctrl+F / Ctrl+H | Find / replace on the page |
| Ctrl+Shift+F | Find and replace in the whole website |
| Ctrl+G | Go to line |
| Ctrl+B / I / U | Bold / italic / underline |
| Ctrl+L / E / R / J | Align left / centre / right / justify |
| Ctrl+] / Ctrl+[ | Increase / decrease indent |
| Ctrl+Space | Remove formatting |
| Shift+Enter | Line break |
| Ctrl+K | Insert or edit a hyperlink |
| Ctrl+Shift+I | Insert an image |
| Ctrl+Shift+Y | CSS Style Designer |
| Ctrl+Shift+B | Format code |
| Alt+Enter | Page properties |
| F2 | Rename the selected file |
| F6 / F7 | Validate page / check spelling |
| Ctrl+Shift+L | Check links in the whole website |
| Ctrl+Shift+P | Publish website |
| F11 / F12 | Full screen preview / preview in your browser |
Troubleshooting
Why can't I edit this page in Design view?
Some blocks can't be edited by clicking
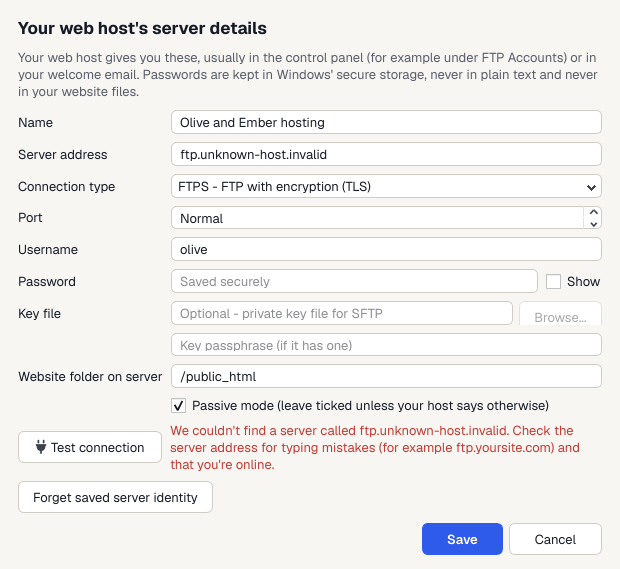
"We couldn't find a server called ..."
ftp.yourwebsite.com or just yourwebsite.com. Don't include http:// or www. unless your host says so."The username or password wasn't accepted"
jane@mywebsite.com. You can reset an FTP password in your hosting control panel.Connected, but uploads won't start
My changes don't show on my website
/public_html or /www). Then refresh your browser with Ctrl+F5 - browsers and some hosts keep an old copy for a while.Pictures don't show after publishing
Photo.JPG and photo.jpg are different files - rename the file in the Site Explorer and let Apollo Editor update the links.Apollo Editor won't start or closed unexpectedly
%APPDATA%\Easier Software LLC\Apollo Editor\logs into the Windows Explorer address bar). Logs never contain your Installation Key or passwords.Where are my settings stored?
%APPDATA%\Easier Software LLC\Apollo Editor. Your websites stay wherever you saved them - Apollo Editor never moves them. Server passwords are in Windows Credential Manager.Still stuck?
We're happy to help. Tell us what you were doing and what the message said.
Uninstalling
If you're moving to a new PC, first choose Settings › Deactivate License. Then open Windows Settings › Apps, find Apollo Editor and click Uninstall. Your websites are not touched. Your settings stay in %APPDATA%\Easier Software LLC\Apollo Editor in case you reinstall; delete that folder to remove them too.
